Showing posts with label Work in Progress; Warmachine. Show all posts

Wednesday, April 29, 2015

Star Wars X Wing Miniatures: WIP HWK 290 Mod


My FLGS Redcap's Corner is running what equates to an RPG X Wing campaign, with pilots leveling up and acquiring more ships, skills and traits. I'm thinking of joining. The HWK seems a natural place to start. After all, if I was in Star Wars, I'd probably flying something like this ship, a cross between a freight truck and Bradley, depending on the situation.

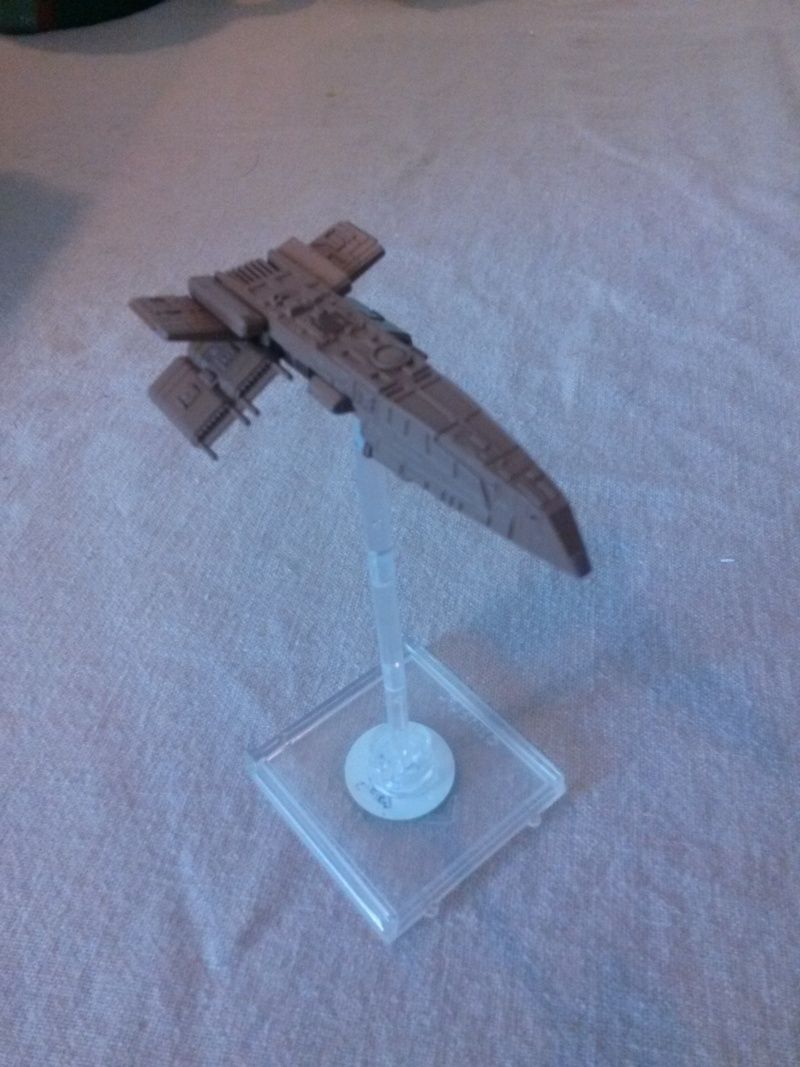
I wanted to mod the HWK because I just wasn't feeling the stock pose since I got it. When I GIS'd and saw some simple moves of engine stacks I realized that I do love some new lines on the ship, basically the flat-top version of the HWK. I want to credit somebody I think named James who I saw on the Team Covenant site for his but at press time I couldn't source it. If I find it I will cite it.


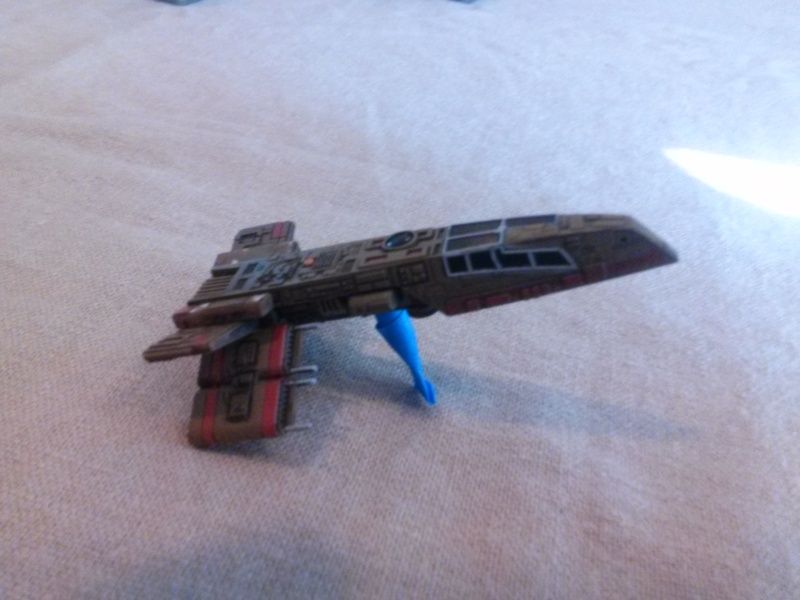
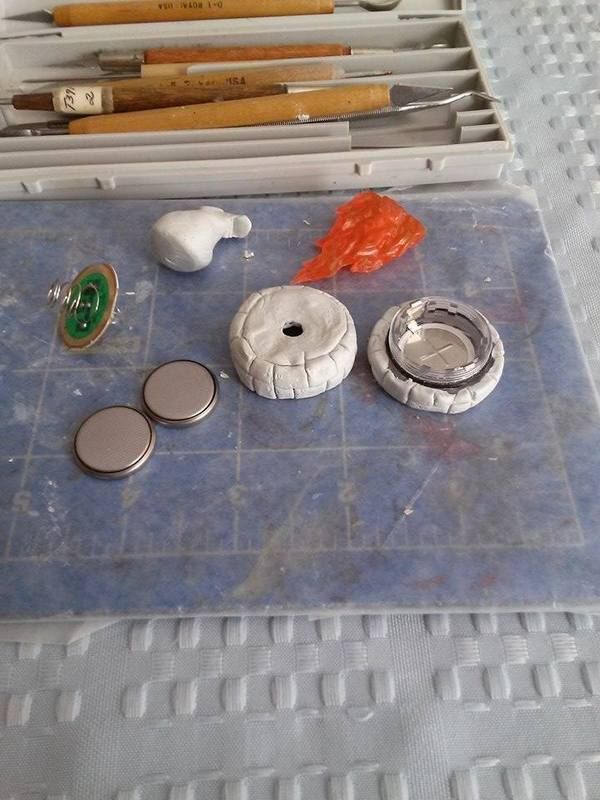
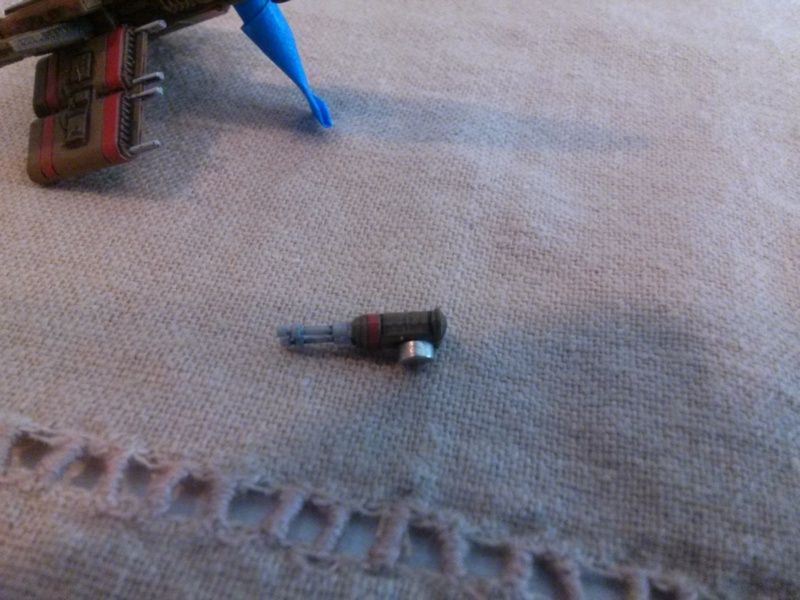
This was fairly easy. I sawed off both wings and separated the wing nacelles. I trimmed and smoothed the pieces for fit and glued it together. I added a magnet to the turret too so it can spin because why not, right?


So now it is primed and ready for paint, which I might actually tackle tonight.


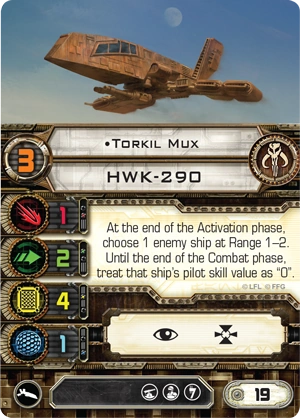
I think I am leaning towards some card art scheme like that of Torkil Mux's... utilitarian and low-key. Maybe a dash of color here and there.

More as it develops!


Friday, April 17, 2015

Bushido: WIP Board Part 4 (Finishing)


 Touch up and finishing the board's sides isn't as glamorous as a resin pour or making stands of bamboo but it is important and as you have probably seen by now, sometimes the materials fail even as materials succeed.


My son Nate pulls off the corner dam.

 
In this case the foam sides ripped a bit here and there when pulling the second resin dam off, mostly due to the cheap foam I used to begin with, but no worries, we'll clean it up. Peel off the silicone used to seal the Duralar to the board and you are ready for caulk.


In previous parts of this build I mentioned I had to do a small, second pour on one end of the board, because the initial 33oz didn't quiet fill the whole thing. So I mixed another batch and filled it in. With that cured, the second dam comes off and we can tackle the "facing" or sides and bring the whole thing together by making a nice "show side". For this task you can use wood veneer, foam core or something similar. This time I used brown caulk, since I wanted to clean this up in a fast fashion and not paint it unless I really needed to.

Using a wet wedge of cardboard to skim the caulk once it was applied, I filled in around the resin water sections, making clean lines and smoothing the irregular portions of the foam. In all, this was 30 minutes of work, though I know my way around a tube of caulk. If you are new to that, practice first. Read the "tooling" times listed and mess around with it. I use caulk in MANY terrain builds. I even sculpted a missing brink on a fireplace entirely out of caulk on a construction job... it's versatile stuff so give it a try and keep it handy. You'd be surprised what it can do for miniatures too.


Up next: The Bridge

Wednesday, April 1, 2015

Reaper BONES: WIP Lit Flame Markers


As mentioned before in the lit Reaper ghost tutorial, the Reaper BONES line features translucent models, including ghosts and fire elements (both fires and fire elementals).


Here is the WIP for lit fire markers and some production notes. See the lit Reaper ghost tutorial in the link above for steps on prepping the halves of the tealight. After the prep steps have been done, move to the following.


Unlike the lit ghosts, the base for fire will be visible. Just like the ghosts, I removed the tealight dome on the upper housing to allow for the bulb to fit into the miniature. I cut/drilled a hole in the bottom of the fire, just like the ghost. Note I used the large fire piece, instead of the smaller model and an orange tealight instead of a green one.


Then I covered the halves in Apoxy Sculpt and after a few hours of setting, I sculpted in lines for stones and I also rolled the halves over cement to give it texture. Once cured, simply paint and reassemble. Bam! Easy peasy. I suggest that you play around with detailing the top of the tealight, the fire area, with elements like stones and even wood, to add to the illusion.

I'll be using these as flourish on Strange Aeons boards and maybe as objectives for Bushido.

Friday, January 16, 2015

WIP: Bushido Koi Pond


Just a fast update on a Koi pond I am making for Bushido (& Strange Aeons I guess). This started as a CD, which I loved thrashing up with steel wool to give adhesion a better surface. The hole had a piece of painters tape over it then texture on top. I textured it inside and out then painted it all. The blocks are Hirst Arts castings from molds I own. The reeds were cut and trimmed and attached with clear caulk which has dried in the pic above. That is a better way to anchor these things for the resin pours. It won't show up visually or react to the resin, kills some areas where bubbles may form in the undercuts and stays flexible even as the resin heats up and then contracts. The reeds were from some aquarium plants I picked up.

I sculpted fish and a turtle out of green stuff. I cut out lily pads from paper napkins, using the embosed details to give them some texture. I then soaked them in green paint/water wash and set to dry on cardboard. The plan is to do one initial deeper tinted pour with some fish in that layer, then a clearer pour at the top with one or two more fish at that layer. Lilly pads go on top and the turtle will ride a rock, chilling.

I'll post up more as I go.


Wednesday, September 3, 2014

NOVA 2014 Open: Jake Hoffman Warmachine/Hordes Hardcore Finals

I knew Jake when he started out playing Warmachine at Roundtable Games in Conshohocken, PA, years past, when my buddy Joe owned what was the best game store ever in my area. Great community of guys that I miss a lot. Always great to see somebody start out, then blow way past you in ability and enjoy the game the way you want. Great guy and good game play ahead!Don't look back, Jake!


Thursday, February 27, 2014

Wednesday, October 23, 2013

Warmachine: Khador Kodiak Conversion


Since I am in a campaign and could be facing my first game this week, I figured I better build the one 'jack in my list that I didn't have built. How's that for campaign strategy? Build the models you tell everyone you'll use? That's me, the winner.

With the advent of larger warjacks by way of updated models and the fact I am 1) cheap 2) unmotivated to trade up to new models 3) loathe to use my favorite warjack as-is (Answer: all) I decided to upgrade the "classic" metal kit.


I added Behemoth legs to a Devastator/Spriggen metal waist. I also added original Kodiak hull spikes to his fists for yup, you guessed it, MORE SPIKES. I just remember when he had Hammerfist and sorta want to honor that tradition. Good old Hammerfist.

I ordered Beast 09 Black Ivan shoulder pads too (seen in pic one before final fitting). I canted the pose a bit and cut/tilted his head. All told I think it is a good "Pathfinder" pose and while he is a bit taller and more dynamic than the original model, it isn't crazy overt. He's just more spiky and hulky while looking more mobile. Yeah, I left his right foot up, wanted to keep that tread detail visible.

More after paint.