Wednesday, April 29, 2015

Star Wars X Wing Miniatures: WIP HWK 290 Mod


My FLGS Redcap's Corner is running what equates to an RPG X Wing campaign, with pilots leveling up and acquiring more ships, skills and traits. I'm thinking of joining. The HWK seems a natural place to start. After all, if I was in Star Wars, I'd probably flying something like this ship, a cross between a freight truck and Bradley, depending on the situation.

I wanted to mod the HWK because I just wasn't feeling the stock pose since I got it. When I GIS'd and saw some simple moves of engine stacks I realized that I do love some new lines on the ship, basically the flat-top version of the HWK. I want to credit somebody I think named James who I saw on the Team Covenant site for his but at press time I couldn't source it. If I find it I will cite it.


This was fairly easy. I sawed off both wings and separated the wing nacelles. I trimmed and smoothed the pieces for fit and glued it together. I added a magnet to the turret too so it can spin because why not, right?


So now it is primed and ready for paint, which I might actually tackle tonight.


I think I am leaning towards some card art scheme like that of Torkil Mux's... utilitarian and low-key. Maybe a dash of color here and there.

More as it develops!


Monday, April 27, 2015

Weekend Star Wars X Wing

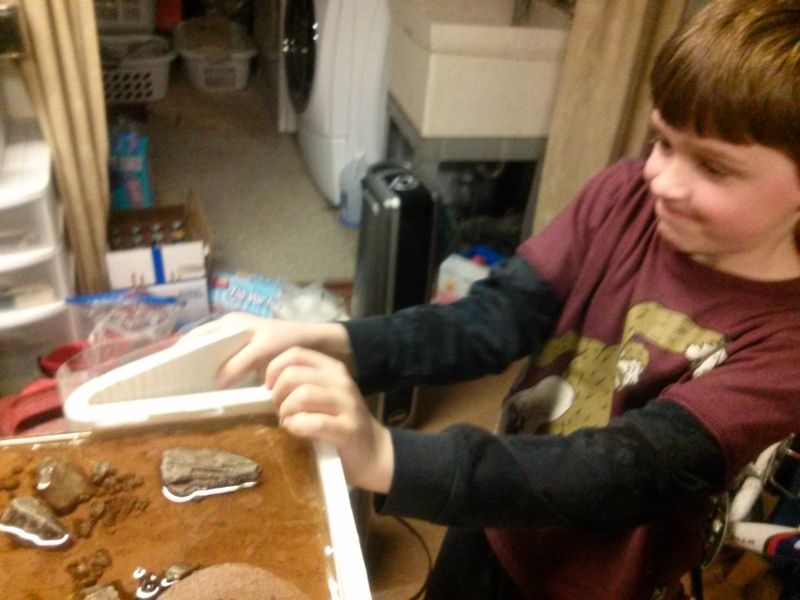
Colin's many points of articulation come in handy when explaining Star Wars X Wing to Jason
I had some of the fine PAGE fellows over Saturday evening to get some X Wing in. My cousin Mike joined us too, him being predisposed to playing this game really well despite not owning anything from the game at all and only playing when he is at my place. This is frustrating.


Colin has been playing steadily but just recently started into the game, Jason really doesn't like the Star Wars setting (you may have heard about that by now) but he acknowledged that the game is well-conceived and fun. Saying that he'd play it again is about as ringing of an endorsement as you can get from somebody who really needs infantry in his game and doesn't care about the difference between a proton torpedo and a photon torpedo. Colin and I offered D&D attack wing as a possible next step since it shares the same game mechanics and has some ground elements but my heating system did tick on when the chill went through the room at the mention of a Wizkids game. We had a 200 point non-scenario match, which was a first for me and probably for Colin and Mike.

Here, Colin's TIE Interceptors break through the trap the B Wings set for them and ride out the buffeting fire they took on their approach.
Farlander and his Dagger Squadron wheel back via advanced sensors and Keyan's intrinsic Stress-eating abilities to thin the darting TIES. Wedge makes it personal and how. The Merc Firespray bloodies everything around it and Lando leaves Chewbacca under the deck with his hydrospanners, ducking into an escape pod with some Colt 45's since it works every time.
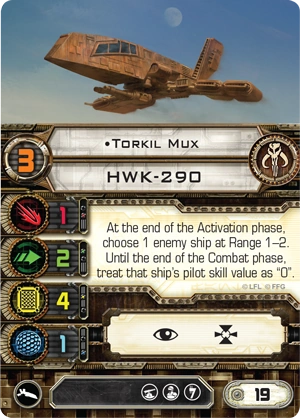
 Colin ran a sweet elite TIE Interceptor force (minus Autothrusters) and Jason ran a bloated TIE bomber with a TIE Advanced escort along with a Merc Firespray. Mike ran a Lando perked-up YT with Chewbacca as crew along with the amazing Wedge Antilles with R2D2. True Story: Wedge rolled 100% on hits for 3 or 4 turns in a row with no dice modifications... you can't really walk that off, you just take it and start thinking about what you are going to eat for dinner, since your pilots never will again. Anyway we had a big ship traffic jam for a few turns as players learned to deal with blocking in ways they hadn't seen before and actually back-lighted the tactics, strategies and game features really well.

Nate the Great debates how to beat up Dad with the best '80's robot voice.
I ran a Farlander triple B Wing list that I liked enough to edit and try again Sunday morning against my 10 year old son, who I brutally destroyed when he ran IG88 against it. Hurray for making your opponents! And no, I don't feel bad. He usually beats me.


Nate88's bold move to close the distance before the warheads can activate.
Everyone is dented up by now, Guri strafes the hell out of Farlander as he up-and-overs his B Wing
Guri comes about hard on the accelerating Farlander, warming up the ordnance as his targeting computer chimes...


Guri's formidable Star Viper hits with a nice spread of Ion Torps, assisted by Focus, dealing Farlander a hit and Ionization as well as the same for a Range 1 Dagger!
Alas it was not to be for the Scum and Villainy, as The Rebels ride out the White 1 moves, shake the crippling Ionization and slowly mop up with their darting B Wings as they ride IG88's wake and slaughter the M3A.


Monday, April 20, 2015

Bushido: Bridge and Completed Board (Part 5)


I completed the bridge and took some final pics of the completed board this weekend. Ta-daaa!

The last piece I wanted to make for this board was a bridge, which you may have noticed as the original, unfinished version here and there through the WIP (and you can see completed above). This bridge is an aquarium item that I got from Amazon for about US$12.00 and is humpbacked, which is of little use in a miniature game, where you'd never trust your models to stand on it, even assuming blu-tak on the bases. The pitch was too steep.
PlastCraft makes 2 great Asian-style bridges cheaper and requiring less effort so I probably would recommend that kit for the preceding reasons but I had already bought this bridge and wasn't going to waste it. So to make it work I added some balsa platforms, measured and placed at intervals to accommodate average bases and movement. These were to be the basis of landings for an Apoxy Sculpt facelift. You may notice that I walked a fine line between realism and play-ability, erring on the side of model stability. I can go back in and add small, steep flights of steps between landings for realism's sake when I get my hands on thin balsa struts but for now this will suffice. I do like the details on the bridge and the height is such that it really blocks LOS across itself and gives great fields-of-fire for archers and the like, better than other kits. It is also basically a lump of rock now with the dried Apoxy Sculpt and is very strong, so I am pretty happy with that. So here are some shots of the bridge build and final pics of the board. I do have large fern beds in progress for this board but I'll show them later in a Bushido battle report.

The bridge before
Here is the bridge enrobed in Apoxy Sculpt, cured about an hour, smoothed and ready for detail.
The first step to detailing was making impressions of rockface using a piece of textured wallpaper. If the Apoxy Sculpt is too fresh then making these impressions will deform the basic shape, so let it set up for awhile first. Since temperature,  humidity and your mixture will impact the tooling time, I can't give you a perfect time period for this but I can tell you that firm to the touch and somewhat hard (what she said) is what you are looking for.
The bullnose added in, using a basic sculpting scalpel.

Adding cobblestones
Checking the "look of it" with a mini. Seems good  so far. Finished with the sculpting I let it cure overnight, prime it and prepare it for paint the next evening.
Here it is with a basecoat of 50/50 desert tan and ceramic blue.
Sponge painted with desert tan

Some green paint with flow enhancer as a wash added to horizontal areas, to emulate mossy areas. Note that the yellow in the tan compliments the green well.
Itsunagi approves. Note the texture on the slab Itsunagi is standing on echoes the texture on the sides of the bridge enough that it looks like it goes together. Could be better but it would certainly be worse without the texture.

Here's the "moss' being mixed: Woodland Scenics Blended Turf, water, Matte Mod Podge, and green paint, mixed until thick. I added that here and there to most horizontal surfaces and that was that.


Up next: Bushido figs, a Bushido battle report, Strange Aeons stuff and some more terrain!

Friday, April 17, 2015

Bushido: WIP Board Part 4 (Finishing)


 Touch up and finishing the board's sides isn't as glamorous as a resin pour or making stands of bamboo but it is important and as you have probably seen by now, sometimes the materials fail even as materials succeed.


My son Nate pulls off the corner dam.

 
In this case the foam sides ripped a bit here and there when pulling the second resin dam off, mostly due to the cheap foam I used to begin with, but no worries, we'll clean it up. Peel off the silicone used to seal the Duralar to the board and you are ready for caulk.


In previous parts of this build I mentioned I had to do a small, second pour on one end of the board, because the initial 33oz didn't quiet fill the whole thing. So I mixed another batch and filled it in. With that cured, the second dam comes off and we can tackle the "facing" or sides and bring the whole thing together by making a nice "show side". For this task you can use wood veneer, foam core or something similar. This time I used brown caulk, since I wanted to clean this up in a fast fashion and not paint it unless I really needed to.

Using a wet wedge of cardboard to skim the caulk once it was applied, I filled in around the resin water sections, making clean lines and smoothing the irregular portions of the foam. In all, this was 30 minutes of work, though I know my way around a tube of caulk. If you are new to that, practice first. Read the "tooling" times listed and mess around with it. I use caulk in MANY terrain builds. I even sculpted a missing brink on a fireplace entirely out of caulk on a construction job... it's versatile stuff so give it a try and keep it handy. You'd be surprised what it can do for miniatures too.


Up next: The Bridge

Tuesday, April 14, 2015

Bushido: WIP Board Part 3


I started to take off the dams that formed the resin; sometimes that exposed somewhat tacky resin, which is ok. It will cure, just give it a few short hours of air. If you built and sealed your dam right it will rip right off. In this case, I used pretty cheap and old foam board and it still tore free cleanly, with only one divot of foam tearing away. No worries! Backfill with caulk and repaint that area. After some tidying, it will look nice.

Right after the damn is pulled free, you see this. It's pretty clean. You can pull away the rest of the silicone or even paint right over it (if it's the paintable type)

Itsunagi seems pleased so far. The river will hold a lot of bodies.

Monday, April 13, 2015

Bushido: WIP Board Part 2 (Resin River)


In part 1 of this build I showed how I rehabbed an old board as a sketch for new water techniques through the assembly of a large river section.

Now, in part 2, I wanted to show some WIP pics of the refinishing and painting of the riverbed and the prep for the resin pour, then, the initial resin pour itself.

As mentioned in Part 1, I added rocks and grit, then sponge painted the rocks, using earth tones. I added some washes to the riverbed itself for some contrasts. If you try this you will notice that what is understated painting without resin becomes very prominent under the lustre of gloss resin. If you have painted a miniature somewhat matte and then gloss sealed it then you know what I mean. Saturation and contrast bumps up a few notches so it is best to be subtle.


In this pic we see the Duralar and foam core "dams" that will be used to form the resin. My method uses Duralar facing the resin, backed by thick foam core and attached/sealed with clear silicone. Especially with deep resin pours, the outgassing process will force the hot, molten resin into every nook and cranny on your board and if it hits foam then the gassing becomes dramatic. Whatever silicone remains attached to the resin after the removal of the dams can either be left or scrapped away.

Here is the dam on the other side of the board.

Here is the first resin pour. This board took more than 33oz.of resin  for the entire length and even then I had to fill in the other end in this picture after this first pour with another smaller pour. Note the finished dock, I seated this using clear silicone. The legs, or footers, are attached to the floor of the river bed with silicone which is a great adhesive that is strong, yet is near-invisible in resin and as importantly, won't bleed or be attacked by the resin's chemical reaction.
Another view of the dam and dock section. This is the deepest water on the board, hence the dock for boats.

Some riverbed painting detail. If you texture it right, the painting is easy and natural. See part one for a description of materials used.
Here is the whole board curing, with a large plexiglass cover to ward off dust.
Checking out the boat with the dock, after the resin has cured. It takes about 24rs for a thorough enough cure for this sort of horseplay but it was fun to put down some figs and see how it is all coming together. Note that I kept all scenery away though, the resin has set and was not impressionable but it could still catch flock and adhere it. Resin is weird. Note the bubble trails from gassing, likely from inside the rocks themselves.


A WIP sampan on a WIP board.

 So that is it for this update. I will be back after I remove the dams, finish the facings on the board, add wave elements to the water and flock. After that, I need to finish the aquarium bridge below for the board set, using Apoxy Sculpt and a little ingenuity.

This set up is the board before the riverbed painting and resin. I wanted to see how the other terrain elements I have been making matched the feel of the board. So far so good I think. Chiyo seems to like it.