Saturday, April 30, 2011

Eversor WIP: He’s a Master of Karate and Friendship for Everyone


Just some snaps of my Eversor WIP. I never liked the severed-head-show-n-tell pose and yet, I really liked his backpack with mushroomcloud pistol stowed, so I wanted him to look like he was going into a scrum 100% hand-to-hand.

I cut him in half at the waist and then repositioned him using a pin, green stuff and then an epoxy overcoat to smooth out the join, give him a more skulking look and to appear to be a bit more like he's fighting when placed next to other models.

I used a Necron Wraith scissor hand plus plastic Catachan bits for his arms and grenades/pouches. The bare hand is a zombie hand and the shoulder guard is an old fantasy Chaos warrior bit.

He still has some flash that needs cleaning and some joins that need filling but that’s basically it.

It seems like his arm with talon may be a bit long.

Thoughts?


Wednesday, April 20, 2011

40K: Valhallan Basilisk


The Basilisk has been finished off, with updated colors, decals and some tweaks here and there.

Monday, April 18, 2011

40k: 3 Guys Short of full Platoon


It has been a busy start of the school term and slow again on the model front. Work/school/life balance is a bit better though and I’m steadily working on things here and there, which is cool.

Last night I pulled out the Valhallan IG to verify that what I’m working on right now is smart, given my goals.

I set out the completed IG, tallied it up and saw that I’m just 3 guys short of a completely painted Infantry Platoon. That’s pretty exciting as I’ve never had that before in 20+ years of painting. That’s why I’m painting Yarrick as a reward, though looking at his stats, I’m not sure what it is I’ll ever do with him on the table.

Also, I pulled out all the Mordheim buildings I own, repairing tears and gluing breaks here and there. Looks like we have decent terrain for those games since I’m too busy to be busting out Mordheim terrain.

What are you guys working on this Spring and how is your progress?

Wednesday, April 13, 2011

Proud Plug: Going on Campaign


Just a quick (and overdue) plug here for my buddy Col. Corbane’s site, Going on Campaign: 
You probably already know Col. Corbane from Corbania Prime (link to your right.) If you play 40k for any length of time then you owe it to yourself to check out what campaigns are really about... and Going on Campaign is a great resource for that.
Not only do you get to use (and breath new life into) most of the crap you sat around building and painting, you get to use those creative juices you brewed by playing games to form richer playing experiences that no one-off game could ever convey. Not only that, you can participate in the campaign community at large, which is rewarding on its own and lends depth to your understanding of how game systems actually play.
Did I mention fluff? Campaigns generate fluff faster than a cotton candy machine. Yum.
A good intro to campaigns is the PDF that Col. Corbane put together, codex-style, to get the ball rolling. It is well produced (and even features some minis from yours truly) so check it out and get those summer campaign planned!
Going on Campaign PDF: http://goingoncampaign.blogspot.com/2011/02/narrative-campaigns-pdf.html

Enjoy!

-Yeti

Monday, April 11, 2011

Zombie Jazz Hands Reloaded or Return to Mordheim


In 1996 I learned I’d be attending Games Day with my friends Wil and James (both of who ended up with Golden Daemons that weekend.) I was so inspired that I threw together a Mordheim Vampire warband and custom base over 1 week, just to join in the fun of entering.


I can haz first cut?
 It didn’t win, partially because it was a slap-dashed unfinished product and primarily because others did amazing jobs with their work. Happily, one judge loved it and took time after the event to sit with me and tell me what to do next time to score better, if I ever wanted to compete again. That was the first and last time I entered anything in formal competition though I did place first in a few internet-based competitions; good constructive feedback, those.

Flash ahead to a few weeks ago when my buddy Jason starts up a Coreheim league at my local club, PAGE. I pull out the old warband and decide that while I’d love to do a new warband for the league (Cthulhu!) this ancient group is still owed some blood and hey, it’s already painted so I can just add some ghouls and henchmen at leisure.

So I repainted the scenic base and gave it jazz hands with new flock mixes, washes and some lichen shrubbery in a nice path, that isn’t too expensive.

I have Dull Coted the miniatures and will rebase/touch up a few things here and there but basically will be leaving the figs alone.


The Vampire is part Dark Eldar Haemonculus (upper) genestealer (hands) and Chaos Cultist (lower) with various bitz and a lot of greenstuff


Ghoulkin

Ghoulkin

Ghoulkin armed with a club, shield and net

The Necromancer is converted from a Chaos Cultist lower, bitz, green stiff and fantasy bit upper

Good Ol' Hatchetback

Ghoul, soon to be replaced by plastics

Monday, April 4, 2011

My Possibly Unique Way to Magnet Mount Leman Russ Sponson Weapons


Ok, a buddy asked me recently to describe how I started mag-mounting my weapons on my new Leman Russ’ sponsons. I haven’t seen anyone else do this, so if they have done it this way, my apologies, didn’t mean to rip you off and not give credit.

I basically wanted a fast, forgiving way to mag mount sponson weapons so this is what I improvised quickly one night. it worked well enough that I wished I had thought of it earlier for my earlier Lemans.
Note: I'm using the previous Leman Russ kit. to my knowledge, the following still applies to the new kit.

Materials needed:
  1. Leman Russ kit
  2. Pin vice with small drill bit
  3. Xacto
  4. Unwaxed dental floss
  5. Small hobby magnets
  6. Krazy Glue
  7. Vehicle stowage (i.e. GW stowage or Tamiya)
  8. Greenstuff and basic greenstuff experience (tools, handling skills)
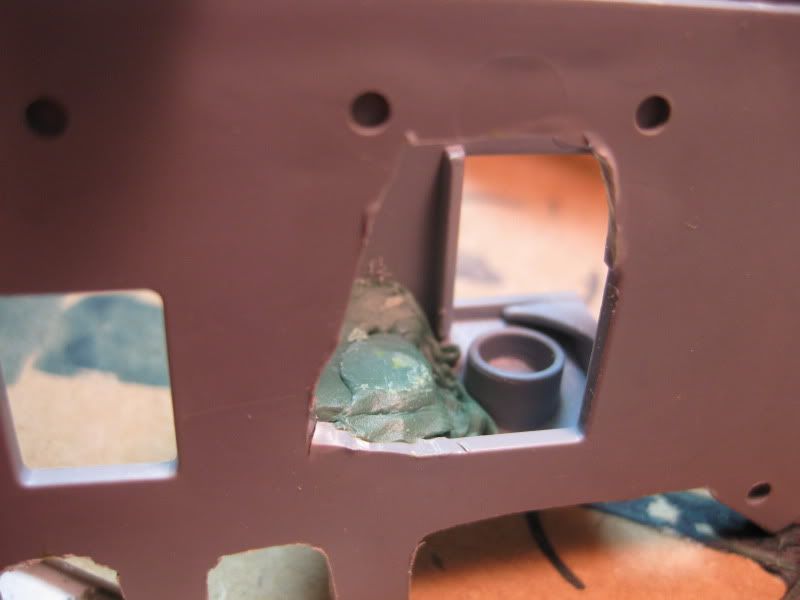
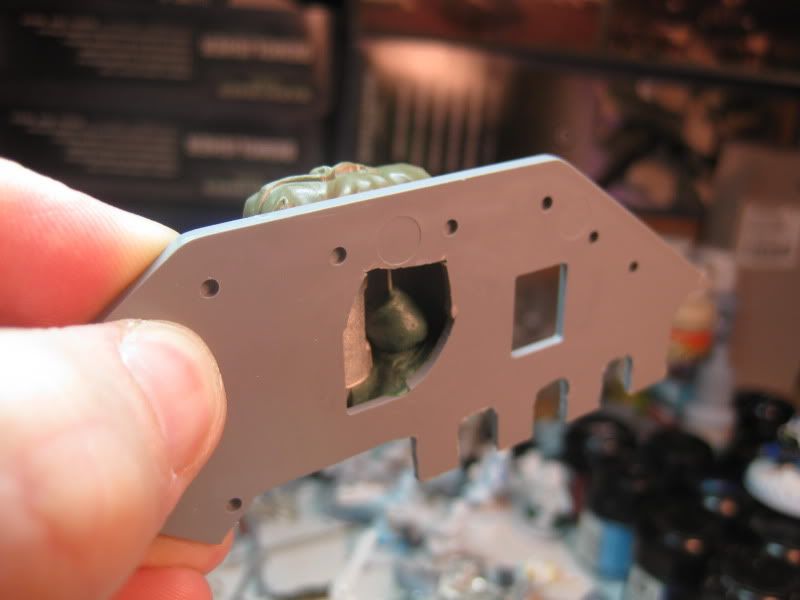
 View from inside the Leman Russ side panel, looking through the hole I cut, into the bottom of the sponson. Note the hole for the weapon post and mag sunk in greenstuff behind it.

1. I cut a large hole through the Leman hull, smaller than the footprint of the sponson tabs on the hull (see pic below.) This hole is necessary so when you change weapons, the thick weapon post has a way to rock in and then sit level in the bottom hole. You’ll see what I mean as you start assembly. I took the lid of the sponson and scored some cris-crosses along the top with the xacto, from about the middle going forward. This is a texture anchor for some greenstuff later. This will need to be covered by stowage or whatever you want so don’t over do it. A small strip the width of a pencil and the length of a sharpened tip about center should do it. Assemble the sides of the sponson and glue to hull as normal, DO NOT GLUE THE SPONSON LID.

2. I filled and leveled the bottom inside of a sponson with green stuff. Then I counter sunk a magnet into that greenstuff “bed” and skim coated over it so the mag is embedded and still level (see pic below.) The mag will need to be essentially directly to the rear of the hole for the bottom post of the weapon that goes in the sponson. You’ll want the magnet very close to the surface of the greenstuff, even visible through it. If it dries too thin, just give it a coat of crazy glue afterwards and let dry.

Remember to orient your magnets properly before glue and greenstuff!

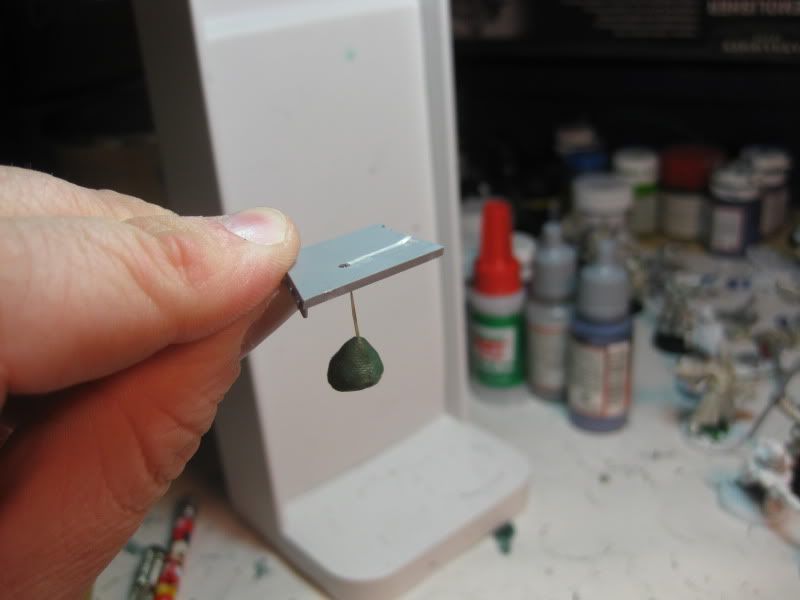
3. In the meantime I took a long length of unwaxed dental floss and glued an end of the floss to either the top or bottom of the other magnet. When that has dried, I wrapped the magnet a few times in floss and then glued it again, orienting the floss so that it is glued in the center of the magnet and leading straight up and away from the center. This is tricky and will result in glued fingers if you rush the steps and forget to let everything dry. Treat what you created with care until you can get to the next step.

4. After that glue is dry, I made a small, “tear-drop” shaped cone of greenstuff around the magnet on the floss, including its sides and up the floss a few mm. Remember to keep your fingers wet for that part. The idea here is to embed the knot of wrapped floss and protect the floss that hangs the magnet. I put that to the side and let harden. As that hardened I tapped a small hole into the sponson lid, roughly over where the magnet is in the bottom of the sponson. Just eyeball it, it doesn’t have to be laser-precise.


5. After all green stuff had dried, I dangled that tear drop magnet hanging from the floss through the sponson lid, and let it grab the mag in the bottom of the sponson. I trim the tear drop as necessary, making sure the weapon in its sponson mount can traverse without being impeded by the tear drop. Shave very little here, the magnet can move laterally if it really needs to, you want that magnet staying in the greenstuff.

6. Once that was good I put the sponson top onto the sponson and fit it together, making sure the weapon (in this case, heavy plasma cannon) is fully seated in both bearing holes and traverses normally. It does. The floss was still poking out of the sponson lid at his point.


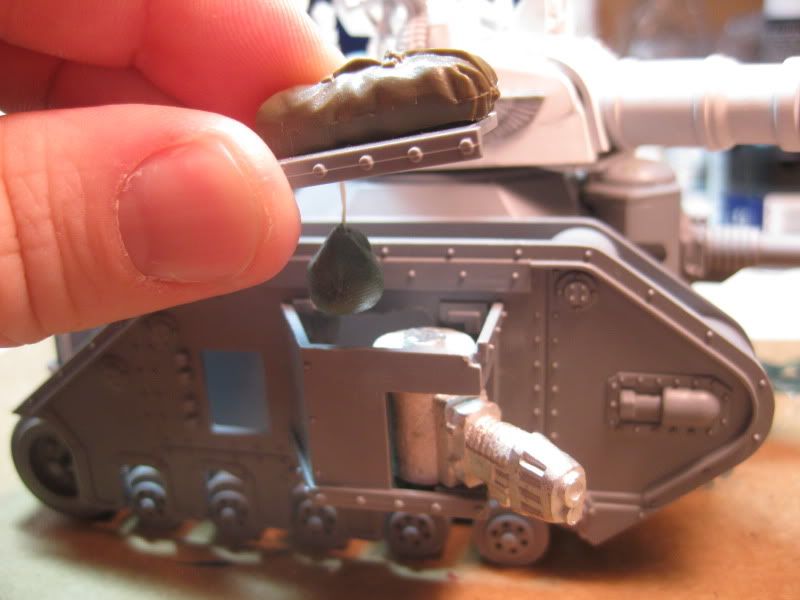
7. Holding down gently on the top of the sponson lid, I lead the floss across the top of that criss-crossing on top of the lid from earlier, starting from the hole, just a few mm’s towards the front. You should take up the slack of the floss inside the sponson and make it tight without breaking the magnet bonds. Glue it with crazy glue right to the sponson top. Leave it together while the glue and floss dries before you try pulling it apart. After that is dry, trim off the extra floss with xacto and reinforce with a small blob of green stuff on the that texture to lock it all down. At this point I used that greenstuff to anchor a piece of Tamiya stowage to hide the hold, floss and greenstuff.


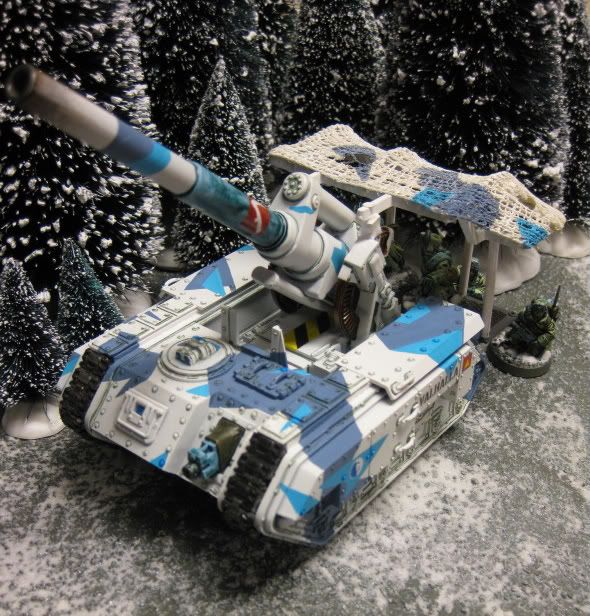
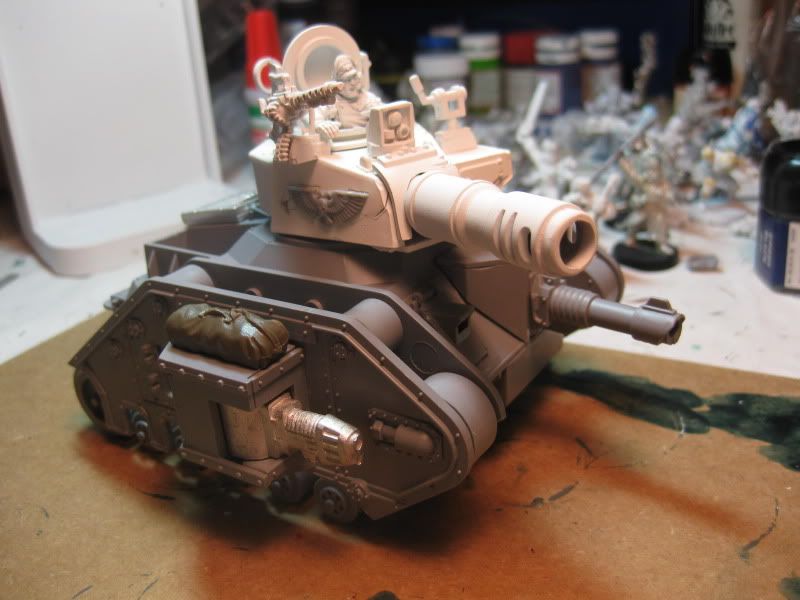
Mr. Pask likes flexability. And pigment. One out of two ain't bad.

That’s it! All-in-all, minus dry-time, it took less than 20 minutes to mag both sponsons. I also mag-mounted the front sponson but that was done the more traditional way (more later.) I dry-fitted all Demolisher weapons and sprue weapons and they all sit tight while popping out easily.

If you have ways of improving on this or run into issues trying it out, lemme know.

Best,

Yeti