Wednesday, April 13, 2011

Proud Plug: Going on Campaign


Just a quick (and overdue) plug here for my buddy Col. Corbane’s site, Going on Campaign: 
You probably already know Col. Corbane from Corbania Prime (link to your right.) If you play 40k for any length of time then you owe it to yourself to check out what campaigns are really about... and Going on Campaign is a great resource for that.
Not only do you get to use (and breath new life into) most of the crap you sat around building and painting, you get to use those creative juices you brewed by playing games to form richer playing experiences that no one-off game could ever convey. Not only that, you can participate in the campaign community at large, which is rewarding on its own and lends depth to your understanding of how game systems actually play.
Did I mention fluff? Campaigns generate fluff faster than a cotton candy machine. Yum.
A good intro to campaigns is the PDF that Col. Corbane put together, codex-style, to get the ball rolling. It is well produced (and even features some minis from yours truly) so check it out and get those summer campaign planned!
Going on Campaign PDF: http://goingoncampaign.blogspot.com/2011/02/narrative-campaigns-pdf.html

Enjoy!

-Yeti

Monday, April 11, 2011

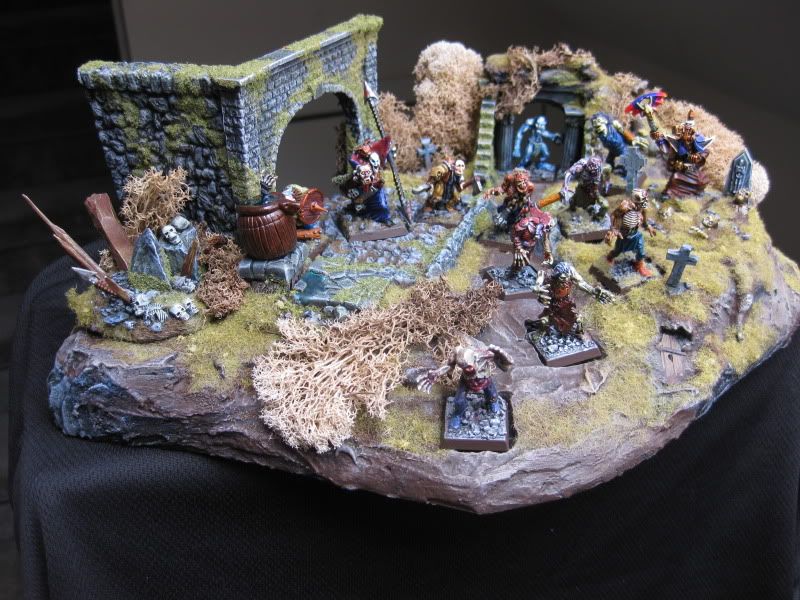
Zombie Jazz Hands Reloaded or Return to Mordheim


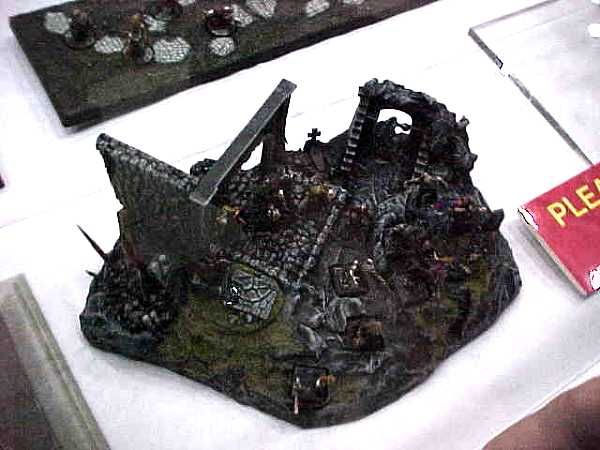
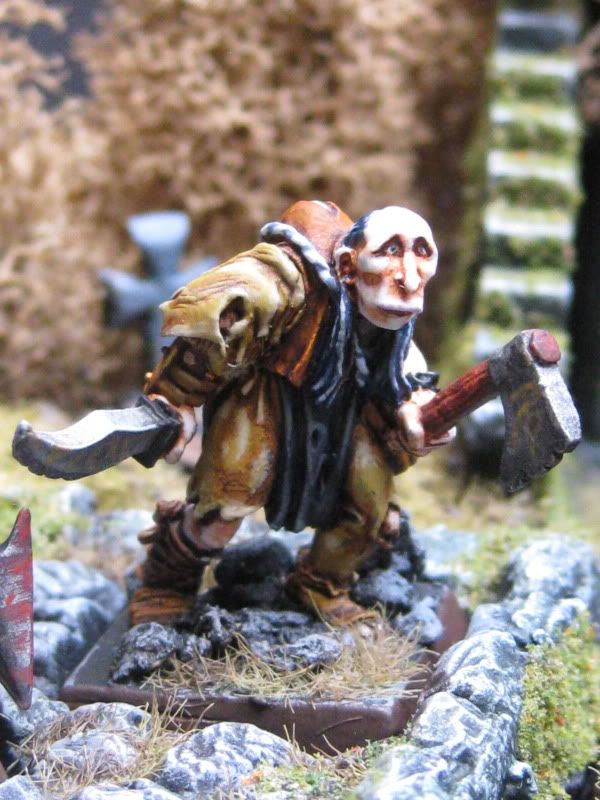
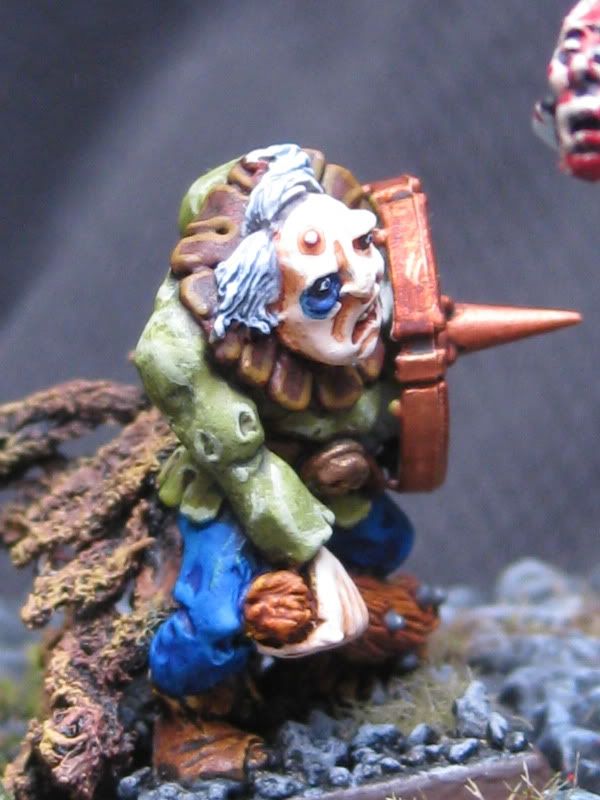
In 1996 I learned I’d be attending Games Day with my friends Wil and James (both of who ended up with Golden Daemons that weekend.) I was so inspired that I threw together a Mordheim Vampire warband and custom base over 1 week, just to join in the fun of entering.


I can haz first cut?
 It didn’t win, partially because it was a slap-dashed unfinished product and primarily because others did amazing jobs with their work. Happily, one judge loved it and took time after the event to sit with me and tell me what to do next time to score better, if I ever wanted to compete again. That was the first and last time I entered anything in formal competition though I did place first in a few internet-based competitions; good constructive feedback, those.

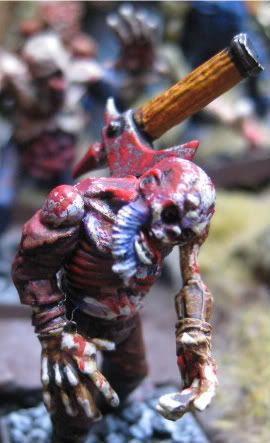
Flash ahead to a few weeks ago when my buddy Jason starts up a Coreheim league at my local club, PAGE. I pull out the old warband and decide that while I’d love to do a new warband for the league (Cthulhu!) this ancient group is still owed some blood and hey, it’s already painted so I can just add some ghouls and henchmen at leisure.

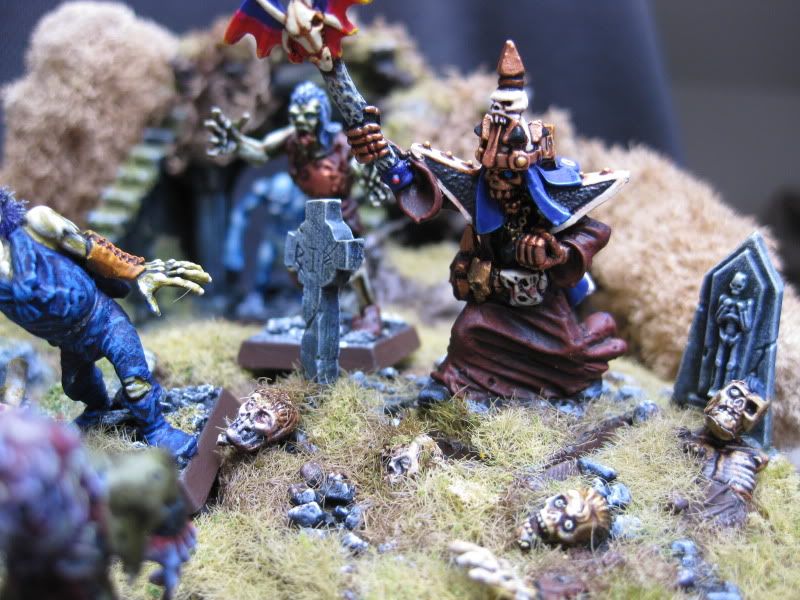
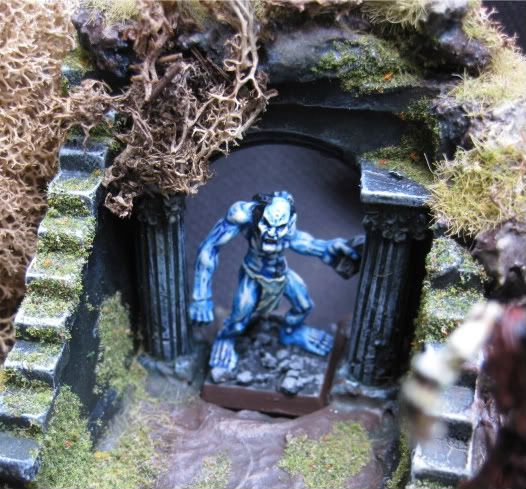
So I repainted the scenic base and gave it jazz hands with new flock mixes, washes and some lichen shrubbery in a nice path, that isn’t too expensive.

I have Dull Coted the miniatures and will rebase/touch up a few things here and there but basically will be leaving the figs alone.


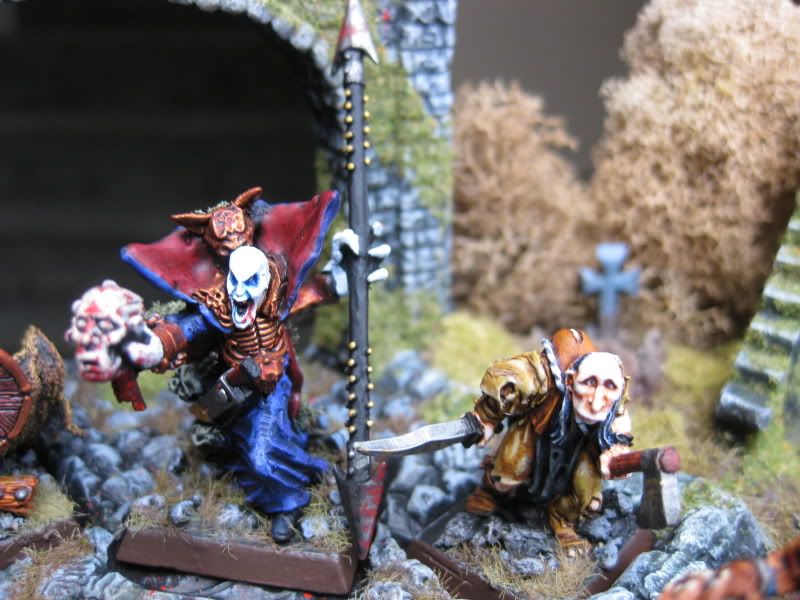
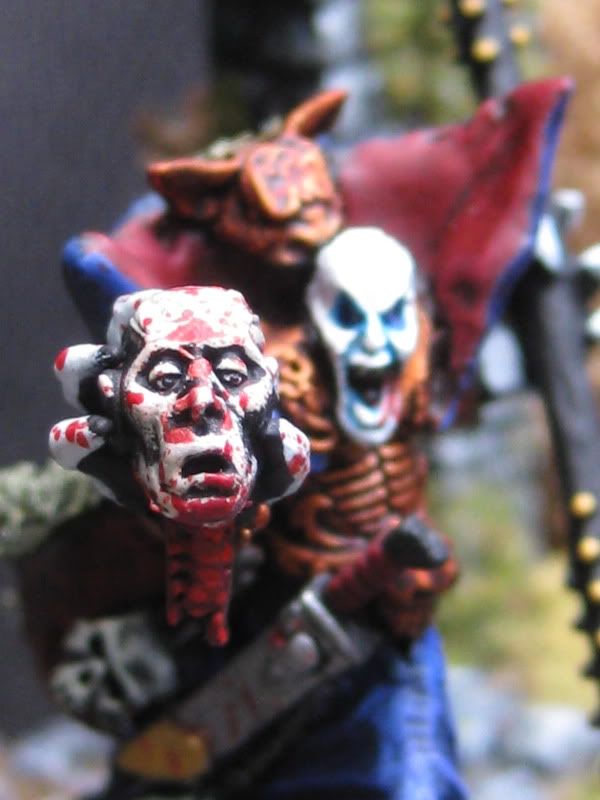
The Vampire is part Dark Eldar Haemonculus (upper) genestealer (hands) and Chaos Cultist (lower) with various bitz and a lot of greenstuff


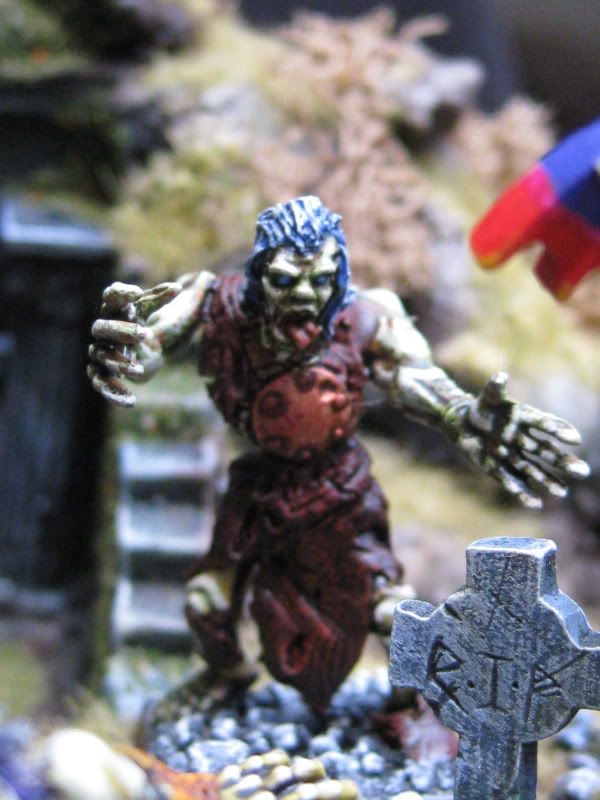
Ghoulkin

Ghoulkin

Ghoulkin armed with a club, shield and net

The Necromancer is converted from a Chaos Cultist lower, bitz, green stiff and fantasy bit upper

Good Ol' Hatchetback

Ghoul, soon to be replaced by plastics

Monday, April 4, 2011

My Possibly Unique Way to Magnet Mount Leman Russ Sponson Weapons


Ok, a buddy asked me recently to describe how I started mag-mounting my weapons on my new Leman Russ’ sponsons. I haven’t seen anyone else do this, so if they have done it this way, my apologies, didn’t mean to rip you off and not give credit.

I basically wanted a fast, forgiving way to mag mount sponson weapons so this is what I improvised quickly one night. it worked well enough that I wished I had thought of it earlier for my earlier Lemans.
Note: I'm using the previous Leman Russ kit. to my knowledge, the following still applies to the new kit.

Materials needed:
  1. Leman Russ kit
  2. Pin vice with small drill bit
  3. Xacto
  4. Unwaxed dental floss
  5. Small hobby magnets
  6. Krazy Glue
  7. Vehicle stowage (i.e. GW stowage or Tamiya)
  8. Greenstuff and basic greenstuff experience (tools, handling skills)
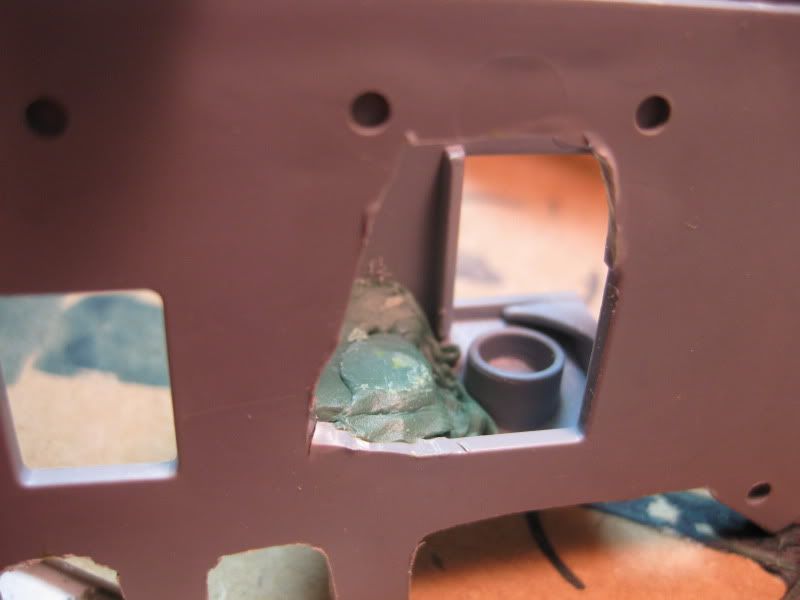
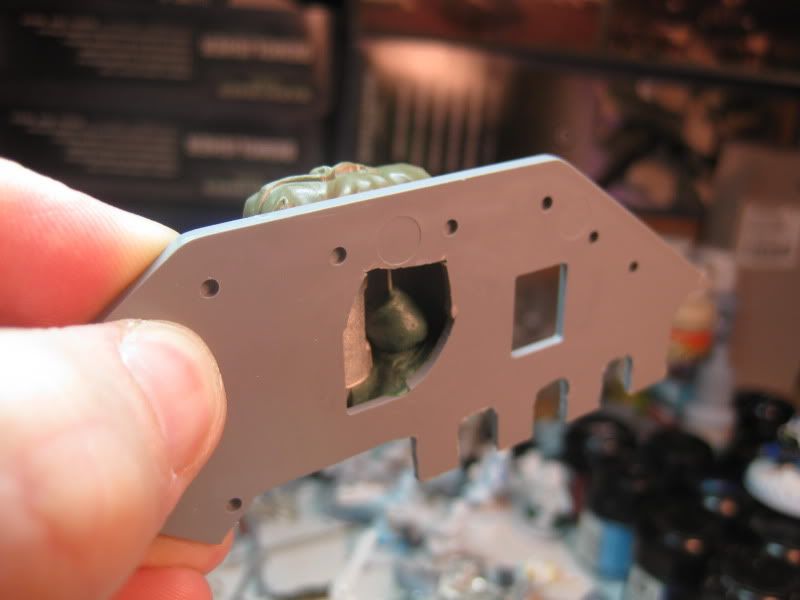
 View from inside the Leman Russ side panel, looking through the hole I cut, into the bottom of the sponson. Note the hole for the weapon post and mag sunk in greenstuff behind it.

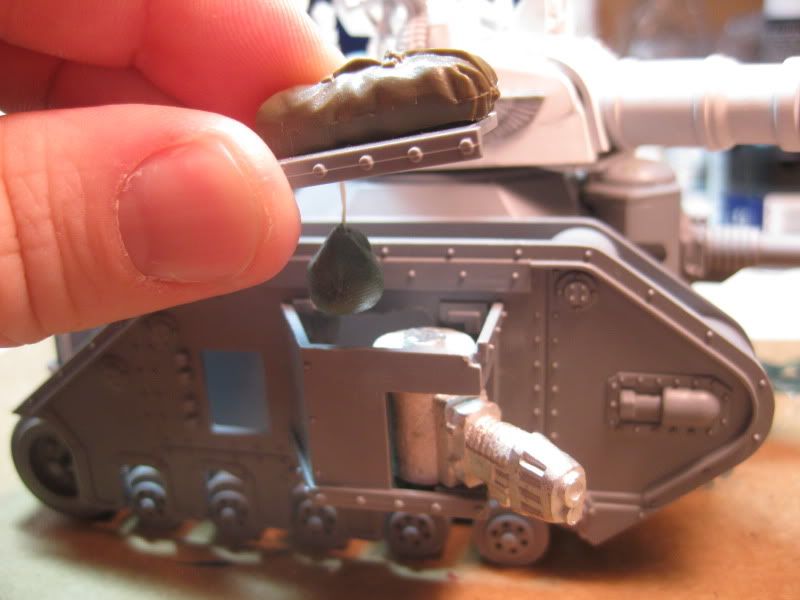
1. I cut a large hole through the Leman hull, smaller than the footprint of the sponson tabs on the hull (see pic below.) This hole is necessary so when you change weapons, the thick weapon post has a way to rock in and then sit level in the bottom hole. You’ll see what I mean as you start assembly. I took the lid of the sponson and scored some cris-crosses along the top with the xacto, from about the middle going forward. This is a texture anchor for some greenstuff later. This will need to be covered by stowage or whatever you want so don’t over do it. A small strip the width of a pencil and the length of a sharpened tip about center should do it. Assemble the sides of the sponson and glue to hull as normal, DO NOT GLUE THE SPONSON LID.

2. I filled and leveled the bottom inside of a sponson with green stuff. Then I counter sunk a magnet into that greenstuff “bed” and skim coated over it so the mag is embedded and still level (see pic below.) The mag will need to be essentially directly to the rear of the hole for the bottom post of the weapon that goes in the sponson. You’ll want the magnet very close to the surface of the greenstuff, even visible through it. If it dries too thin, just give it a coat of crazy glue afterwards and let dry.

Remember to orient your magnets properly before glue and greenstuff!

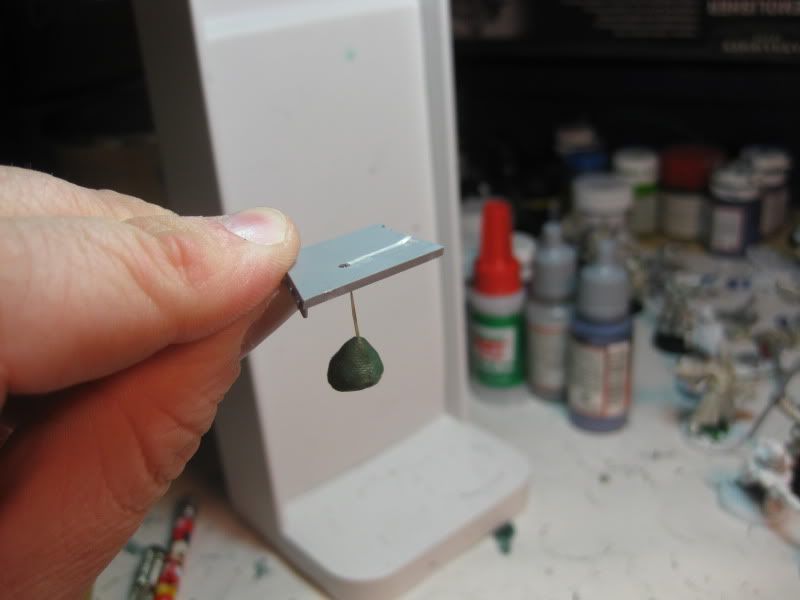
3. In the meantime I took a long length of unwaxed dental floss and glued an end of the floss to either the top or bottom of the other magnet. When that has dried, I wrapped the magnet a few times in floss and then glued it again, orienting the floss so that it is glued in the center of the magnet and leading straight up and away from the center. This is tricky and will result in glued fingers if you rush the steps and forget to let everything dry. Treat what you created with care until you can get to the next step.

4. After that glue is dry, I made a small, “tear-drop” shaped cone of greenstuff around the magnet on the floss, including its sides and up the floss a few mm. Remember to keep your fingers wet for that part. The idea here is to embed the knot of wrapped floss and protect the floss that hangs the magnet. I put that to the side and let harden. As that hardened I tapped a small hole into the sponson lid, roughly over where the magnet is in the bottom of the sponson. Just eyeball it, it doesn’t have to be laser-precise.


5. After all green stuff had dried, I dangled that tear drop magnet hanging from the floss through the sponson lid, and let it grab the mag in the bottom of the sponson. I trim the tear drop as necessary, making sure the weapon in its sponson mount can traverse without being impeded by the tear drop. Shave very little here, the magnet can move laterally if it really needs to, you want that magnet staying in the greenstuff.

6. Once that was good I put the sponson top onto the sponson and fit it together, making sure the weapon (in this case, heavy plasma cannon) is fully seated in both bearing holes and traverses normally. It does. The floss was still poking out of the sponson lid at his point.


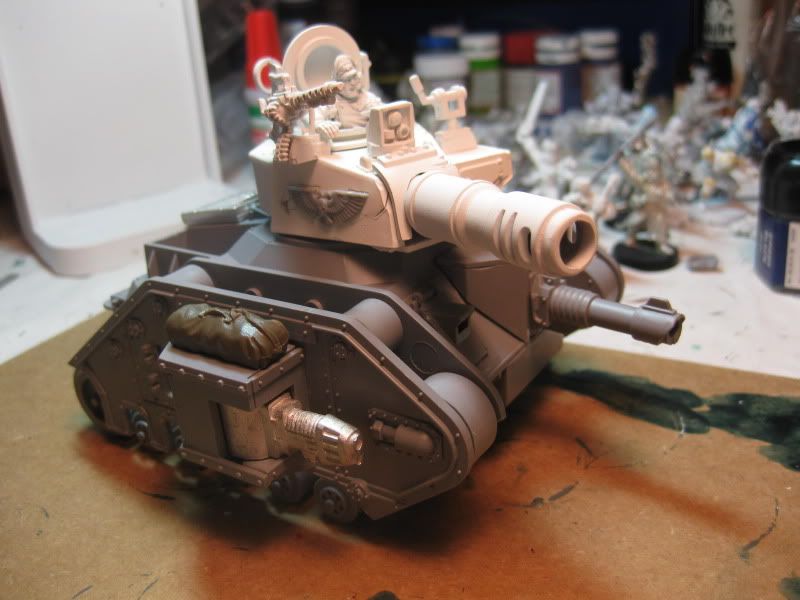
7. Holding down gently on the top of the sponson lid, I lead the floss across the top of that criss-crossing on top of the lid from earlier, starting from the hole, just a few mm’s towards the front. You should take up the slack of the floss inside the sponson and make it tight without breaking the magnet bonds. Glue it with crazy glue right to the sponson top. Leave it together while the glue and floss dries before you try pulling it apart. After that is dry, trim off the extra floss with xacto and reinforce with a small blob of green stuff on the that texture to lock it all down. At this point I used that greenstuff to anchor a piece of Tamiya stowage to hide the hold, floss and greenstuff.


Mr. Pask likes flexability. And pigment. One out of two ain't bad.

That’s it! All-in-all, minus dry-time, it took less than 20 minutes to mag both sponsons. I also mag-mounted the front sponson but that was done the more traditional way (more later.) I dry-fitted all Demolisher weapons and sprue weapons and they all sit tight while popping out easily.

If you have ways of improving on this or run into issues trying it out, lemme know.

Best,

Yeti

Thursday, March 31, 2011

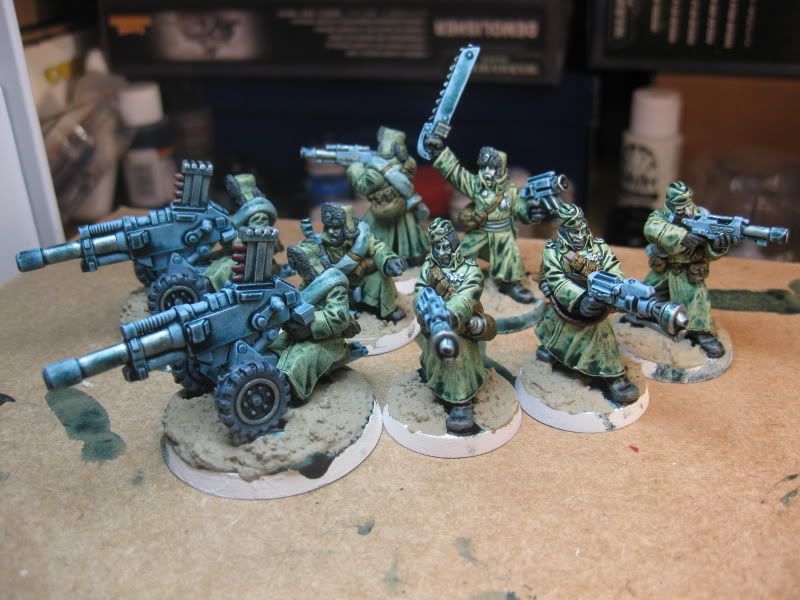
40K: Valhallan Reinforcements Done


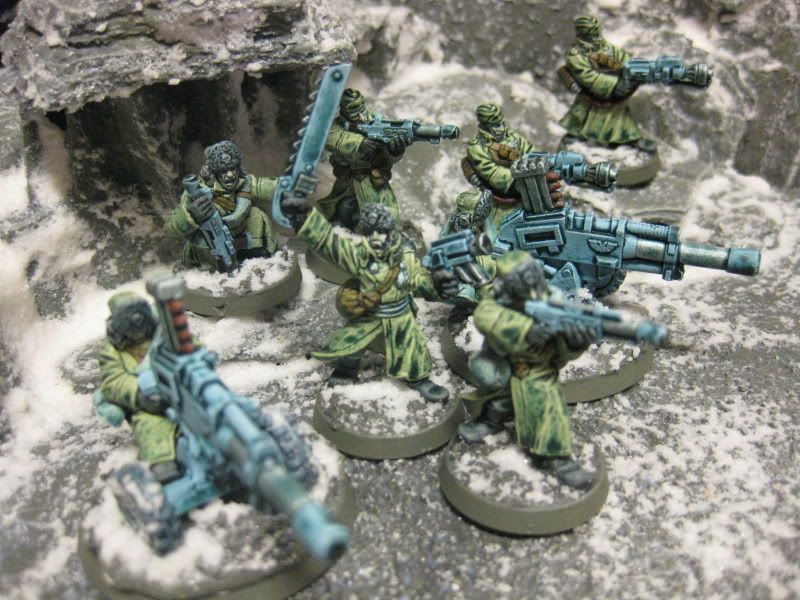
Ok, these are finally done (for now.) I'll add some black to the flamethrowers at some point but for now, they are table-worthy.

This allows for an autocannon in three squads and flamethrowers for the PCS.

I'd really like to get a Psyker Battle Squad to the table next but I think I can only afford a kit-bash at this point.

Tuesday, March 29, 2011

40K: Valhallan Reinforcements

There is some progress on the reinforcements for the 1500 point list: 2 more autocannons and flamers as well as a sarge and some troopers for the mix. This should get me to fully painted after they are touched up and based. Flamers need some soot/scorch on the nozzles and fur needs some white (forgot that before I stained them.)

Friday, March 25, 2011

Auto Pilot

Sorry for the silence. I had three classes this term at university and still have my full time job to boot. I finished the term with straight A's but had no time for painting or playing. It happens.

That said, I'm back to painting this weekend and maybe some Memoir at some point soon.

I have 3 more classes this term but I'm hoping I'll have a breather for room enough to paint once a week for awhile.

Stand by for some updates.

Best,

Yeti

Thursday, February 10, 2011

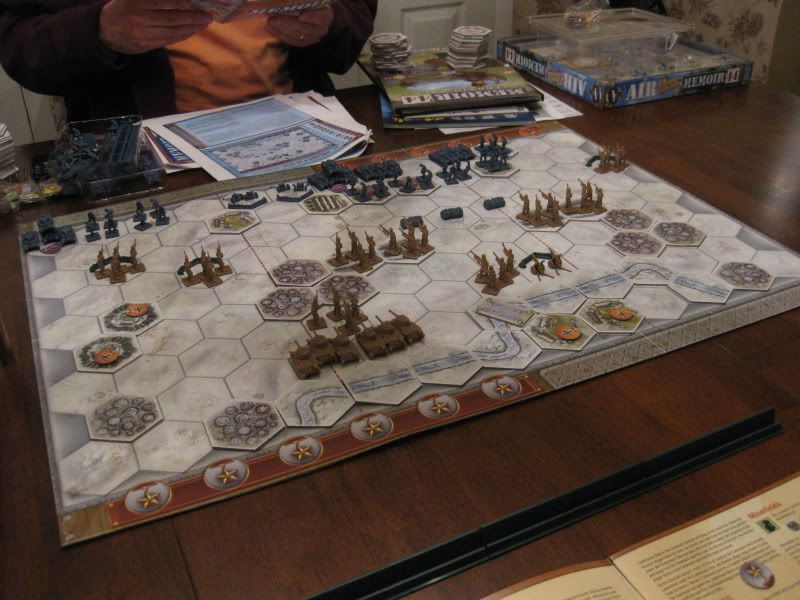
Memoir '44: Breakout at Klin

.
WWII's most famous Russian, videogame Gary Oldman.

Memoir '44: Breakout at Klin

Those that play Memoir ’44 are familiar with 2 things already about the Eastern Front expansion featured in this write up: Eastern Front is probably the best army expansion to date and many people have already reviewed how the army works (so I’ll avoid a run down, better supplied by better reviews like this one: http://www.rpg.net/reviews/archive/11/11710.phtml

Instead, I’ll just share my impressions of how it went for me as a desperate Russian force in a holding action, trying to stem the tide of advancing 1st Panzer Division looking to break out from their faltered offensive against Moscow in early December, 1941 (aka, the first time I played with these new rules.)

My cousin Patrick played the Germans in this scenario. Pre-game I presented him with some brass actually fired from an M1 Garand. I thought he’d take it easy on me because of that, but no such luck.


Set Up: The interwebs seem to peg this scenario as an average 80% chance to win for the Germans. I agreed with that before I even played the scenario. See the mission here, page 12: http://cdn0.daysofwonder.com/memoir44/en/img/mm_eastern_en.pdf

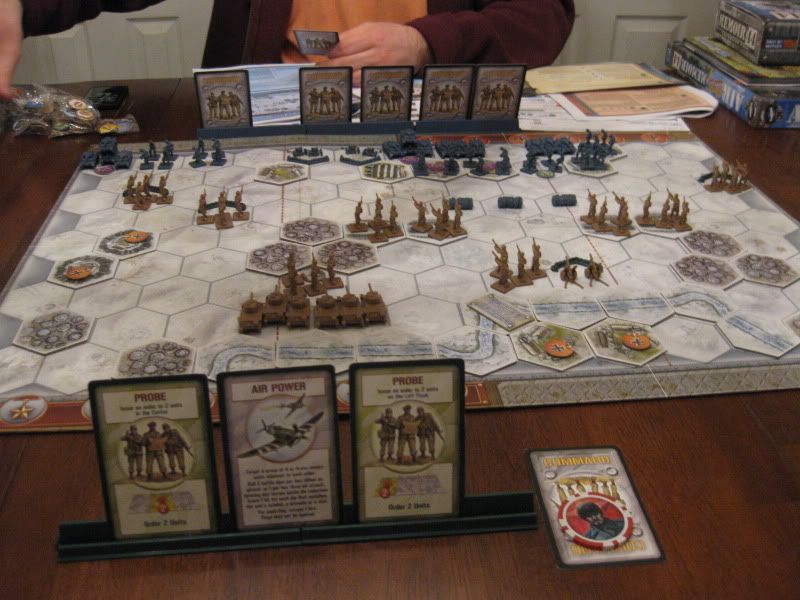
The Eastern Front has an interesting mechanic meant to demonstrate the political influence on Rooskie forces in the field. For those versed in Memoir, you are used to the cards in your hand simply being played turn-to-turn. Not so with the Russians. Basically Russians have to decide which card to play one turn ahead, putting the selected card under a “Commissar” chip next to your hand, signifying the infinite wisdom and stubborn inflexibility of a paranoid, dysfunctional Russian military machine (read: inflexible and slow to adapt but win by attrition.)


A few exceptions to the harshness of Russian card rules aside, it did bring awesome depth to the play, I felt like I was a frustrated Russian officer at disadvantage, just not getting the support I needed as I marshal a fighting stop, and counting on a lot of luck for my men.

I suppose this is great for fluff players and frustrating for power players, if such a thing exists amongst Memoir players.

Russian Pre-Game Prediction and Tactics: Russian loss. Looking at the mission I figured it made the most sense to play left flank cards as priority from the start to abandon the vulnerable positions the 2 infantry units held North of Golyadi. The town itself gave two medals for German occupation in a 6 medal game, so why feed two unit medals into that inevitable attack, lead by elite German armor of all things. I could almost loose the game on that left flank (which is historically accurate) and that is pretty much what ended up happening in real life.

Assuming I could disarm the ticking West flank, I would then try to consolidate enough of my back line to absorb a German push down the center and a German flank to the Northeast of Nekrasino. I counted on mob tactics, pincer assaults. From there I would get a feel for the Russian Command Rules and also try to adapt to the German’s wealthier card play as best I could.

Game Highlights: Unfortunately for Russia, Patrick rolled with 6 command cards to my four, went first and early-turn trounced my Golyadi pickets almost immediately, not even giving me a chance to redeploy them to the woods in the South.

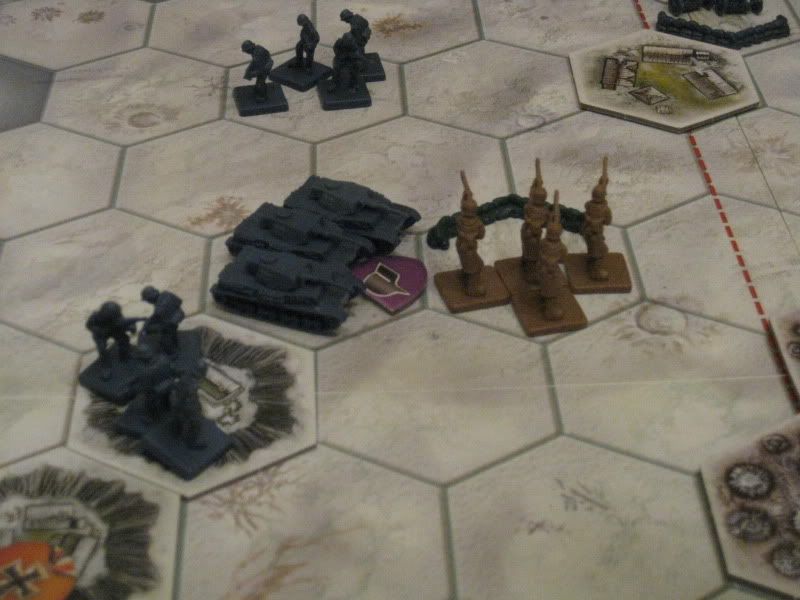
Ouch. 2 medals early game and the elite 1st Panzers sped into the Western outskirts of Golyadi.

To their credit, my infantry bled the Germans well in terms of the time it took to give up Russian medals (the second squad stuck to a man and ignored retreat flags, stubbornly.) But it didn’t look good.

CRACK. THUD. BOOM.

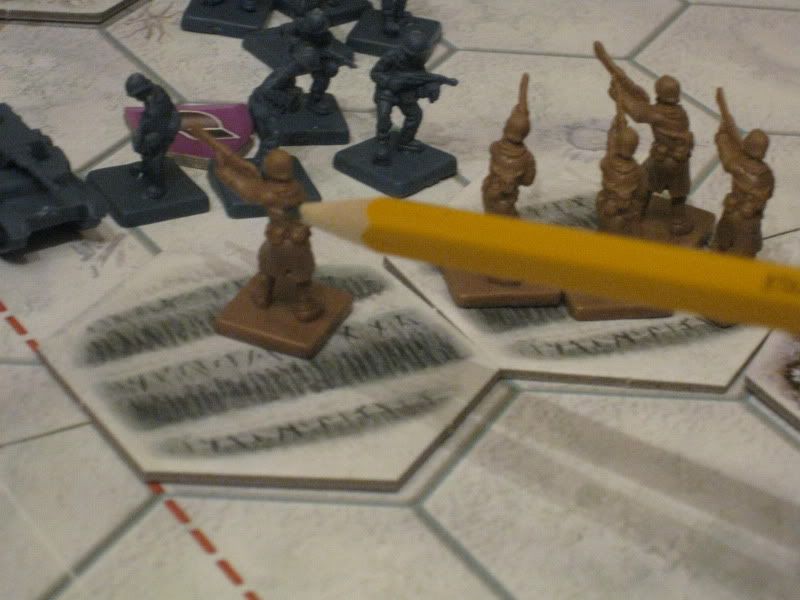
Still standing.

By turn 3 or so Patrick had 4 medals out of 6 by holding Golyadi and inflicting casualties.

I had played 2 or 3 hands with the Russian Command rules and already felt the stress of holding “good” cards for the predicted enemy movements and mulling when to get them under the Commissar chip to play next turn. In this scenario, Russians held 4 cards, which meant that card management flubs were extremely unforgiving.

With my one Air Power card essentially committed ahead of time (reducing its effectiveness when played too) and a Recon 1 card held as a wild card (see Russian Command Rules on pg. 3 of the PDF) that left 2 cards to consider and have as options. Through the game I held mostly left flank cards which didn’t do me much good after Patrick wrapped up Golyadi. I also found I didn’t have much time to “burn” useless cards from my deck on a weak play but I may have to try that in the future more. I did have one particularly stubbon squad of infantry in trenches hold off combat engineers (who ignore dice modifiers for terrain.)

This guy right here... this is the guy

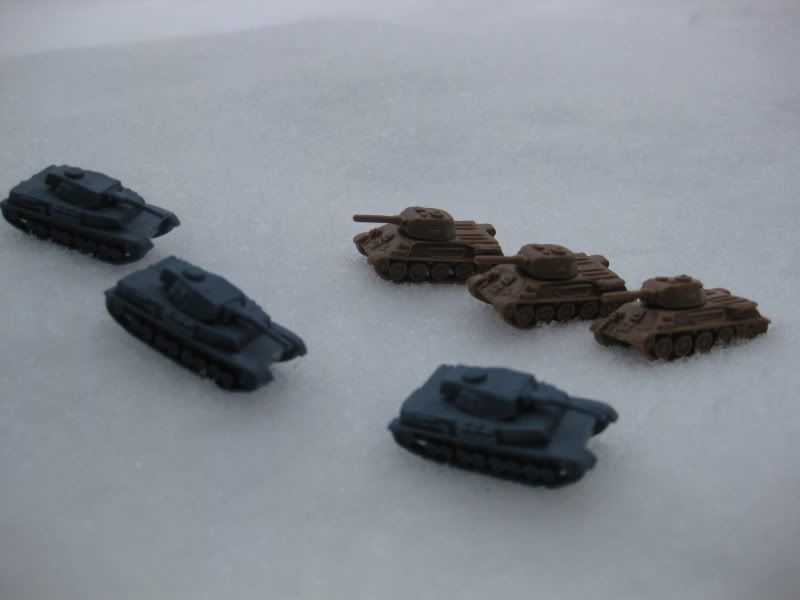
Mid-to-End Game: I was able to play the Counter Attack card once which helped ultimately get a medal and my Air Power card did thin his artillery and reserve tank units a bit but the Commissar chip delayed the opportunity for a strong Allied air attack (I almost never get to roll two dice in a section!) A German thrust down the center sealed the deal for Patrick. At one point the Luftwaffe sent Stukas against the Westernmost T-34’s, forcing them to retreat into the frozen river near Nekrasino and then loose a tank to the thin ice.

Conclusion: 7 turns, 6 Germans medals, 2 for the Russians.

I love this expansion so far. I need more games under my belt to internalize how the average Russian card play will be influenced by the Russian Command Rules. This mission seems a German certainty (Germainty?) from the start but that’s why the Russian flavor imbued in the rules works so well… you like playing the missions despite the plodding feeling the army has, or at least, I did.

You may be Great Partriots or from The Fatherland but ya'll made in China, beyotches.