

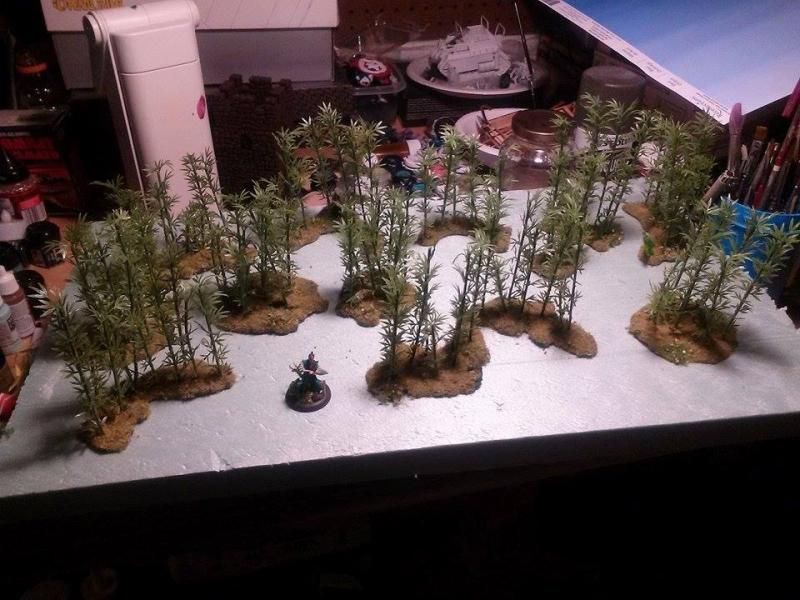
Years ago I had built a 4’x4’ table for Warmachine (on the Privateer Press Forums) and while
building cabinet components for it I stumbled upon Gorilla Glue as a means of
making terrain. I want to mention that if you can cut and bevel foam core or materials like that then you may
not want to use Gorilla Glue as much as I do, but for bamboo trees, Gorilla Glue seems to be a solid and resilient way to base thin plastic trees. That said, I tend to use Gorilla Glue a lot for everything.
 |
| Gorilla Glue bases |

 |
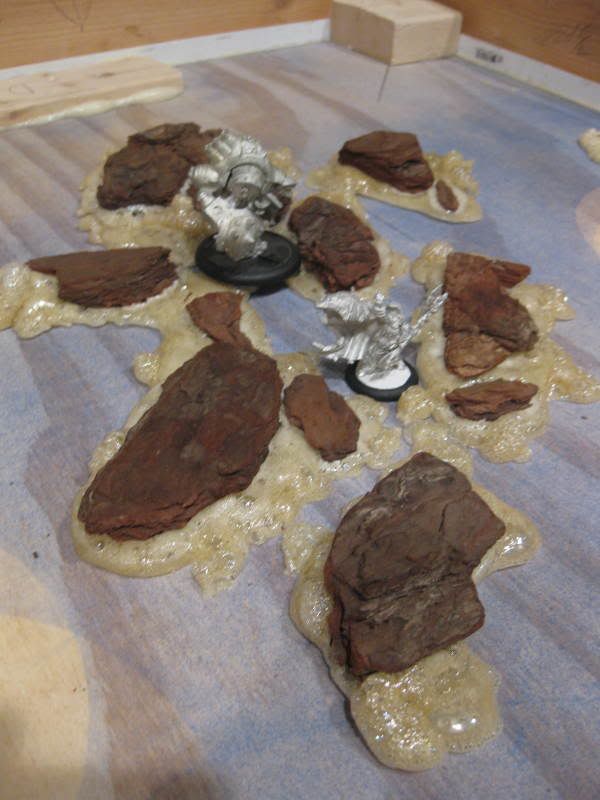
| Gorilla Glue rock piles |
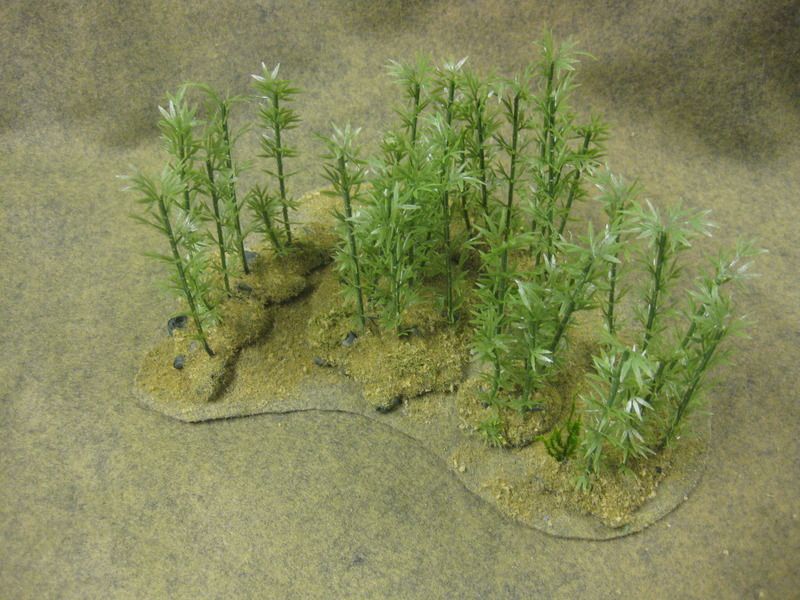
It is excellent for building terrain and all terrainy materials: wood, foam, paper, plaster, etc, etc. Gorilla Glue is unique in that when exposed to water it foams then dries rock hard. So it gap fills and retains some flexibility. It is paintable and cutable. With a little practice, it can be a fast and more-than-adequate trick for terrain.

I sourced the bamboo I am using from Amazon,
a 100 piece bag for about US$13.00 shipped direct from China, which may take a
few weeks to get to you but the price is right. I picked these because the bigger
sizes included have a wire core. You may imagine that getting thin gauge trees
to stand upright in a resilient fashion can be difficult. But if you are
willing to set up a production farm in your house for a week you can get a
decent amount of stands of bamboo using the tree kit, Gorilla Glue, basic
tools, some water and things to keep the trees propped up while they set. After
that, paint and flock to taste.
 |
| This is one bag of trees. Not bad! |
In all, these trees took about a week to bang out but that
includes the setting and dry time. If you take setting and drying out of the
formula then I probably have spent about 3 hours of actual labor.
 |
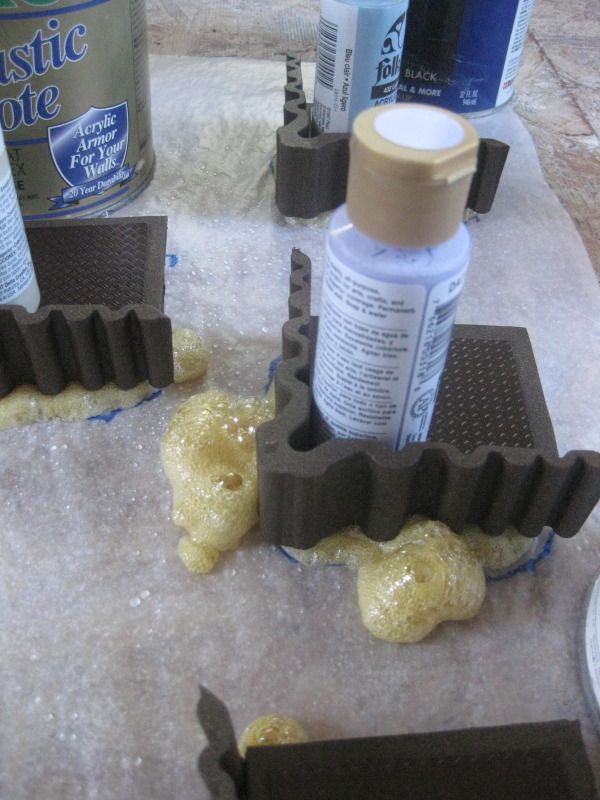
| Note the bottles supporting the trees. See the footers? The foaming has begun thanks to being dipped into water. |
- Using a pen, wrap the bottom of the bamboo around the bottom of the pen, making a circle that you can then fold into a footer. If you can get it to stand on it’s own this way then A+. If it sorta stands that is ok too, the glue will surround and use it to keep it upright. I sat and watched Ninja Scroll and “rolled” all of the trees in the bag in one sitting. I suggest you keep them sorted: trees that stand solidly and those that sorta do. The smaller trees you won’t be able to roll footers but you should abrade the bottoms: if it is sorta “furry” with shredded plastic that is good; you want surface area for the glue to grab
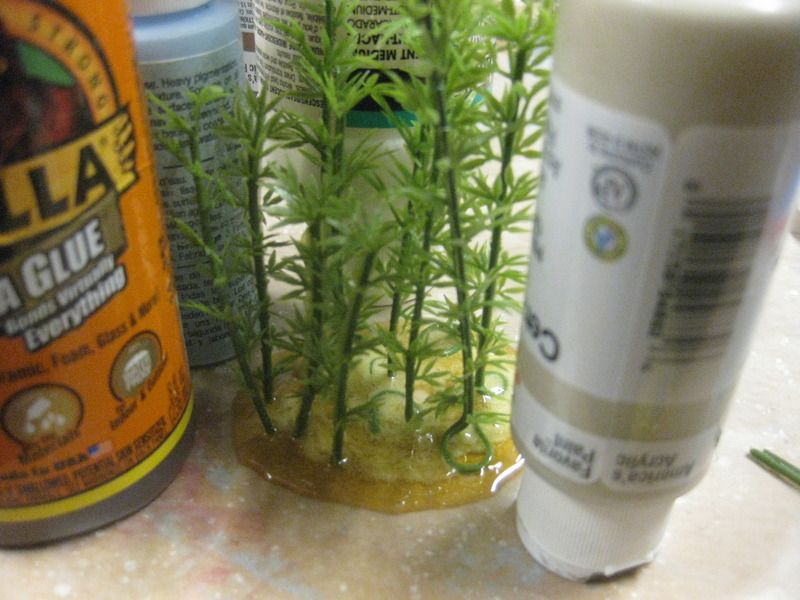
- Take some wax paper and tape it down to a long board or something smooth (as in pic above). I trash-picked a shelf and use that so I can move it around. The wax paper will be where you pour the Gorilla Glue and when it dries, simply pull it up.
- Pour glue in a stand-shape, like a crescent. It is hard to
describe how thin this should be. You may want to pour a few bits of glue and
see what it does. Best I can say is a stand should be about two fingers wide
and about a finger long, in a curve. This lets them look natural in scale, you
can place two together to form a circular stand, makes removal for minis during
a game easier (and better looking) and it is easier to paint and flock. But experiment
and do what you like with shapes and sizes. I use flocked wool/felt for the actual templates for woods and just place these trees on top or take them up as models move through, leaving the template. So I only make crescents for stands and a few circular stands to fill in between the crescents.
- When your glue is out, it will level on its own but it won’t spread out due to the wax. So, use a stick to carefully smooth out the contour. Do that and the glue will level into a smooth shape. You probably have 20 minutes tooling time for this. Careful not to rip the wax paper beneath. Do that and you are starting over.
- Now that the glue is out, take the trees with the best footer. Have a water jar next to you. Dip the footer into the water then put the tree into the glue. Use your stick to push glue over the top of the footer so it is completely under the glue. Best to have other paint bottles nearby to place next to the trees to keep them upright as you go, as in the picture. So, a solid tree is in, add a few smaller trees by adding glue to the bottom then dunking in water, then putting them into the glue with the first tree. Then, add another stable footer tree after that, covering with glue as described above and use the branches of both small and large trees to hold each other up. You’ll add paint bottle next the trees as you go. Every tree or so, wet your hand and shake it at the glue, the water droplets will foam the glue. I usually use between 4-6 trees in a stand. When you get to the end of the tree stand, try to use a solid footer for the last tree. As you build these stands you’ll see where you can use the less stable trees as long as they are propped up by bottles or whatever you use. At this point you’ll want to check on them 2 or 3 times over the next hour as the foaming starts. Trees may move and you may want to nudge things back upright. If glue looks like it isn’t doing anything after 2 hours, spray with water again, it is sensitive to humidity, or lack thereof.
- Once dry (8-24 hours) peel up from the wax paper. You may notice wet glue underneath. This was trapped during the process. No big deal. Set on it’s side and let it bubble out and dry. Once dry, cut it off with an Xacto. Trim anything that bubbled out or is generally not smooth looking.
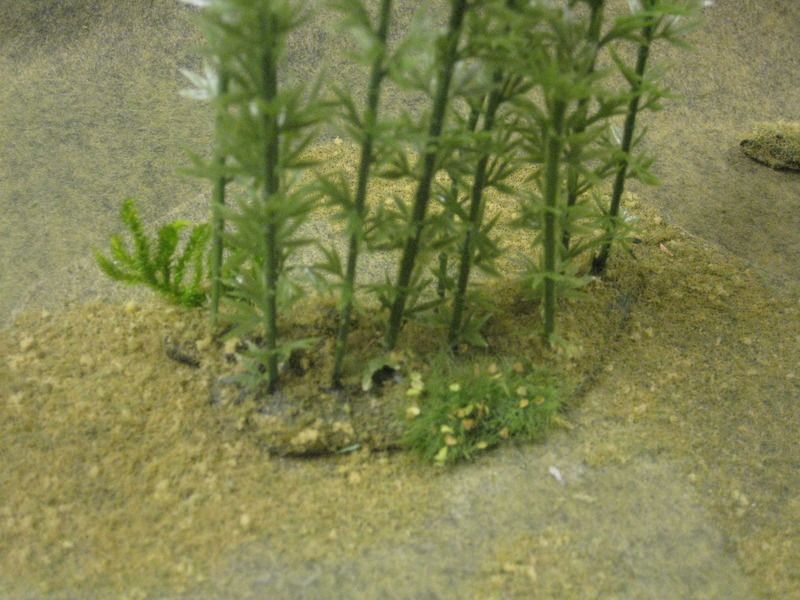
- Now you can either paint and then flock or flock right over it. I base paint with a green very close to the trees so I don’t have to care if it gets on the trees. You can even paint some of the big bumps as rocks which speeds painting/flocking and adds visual variety.
- I use Mod Podge Matte to slather the base then flock. That’s it! Note that because the trees are wire, you can bend them to make small corrections after the glue is dry. just be careful not to go bonkers with a rocking motion as I am sure the footer will break free at some point. Try a small pliers at the base and bend with your finger. A little will go a long way.
 |
| Again, footers from rolling the trees on pens, overlap the glue over the footers, use paint bottles or other objects to support the trees during curing. |
If you are new to terrain, this may take one or two times to
get right but see it through, be ready to improvise how you stabilize the trees
during curing and that is the hardest part.
If you have questions, just let me know and I’ll help you
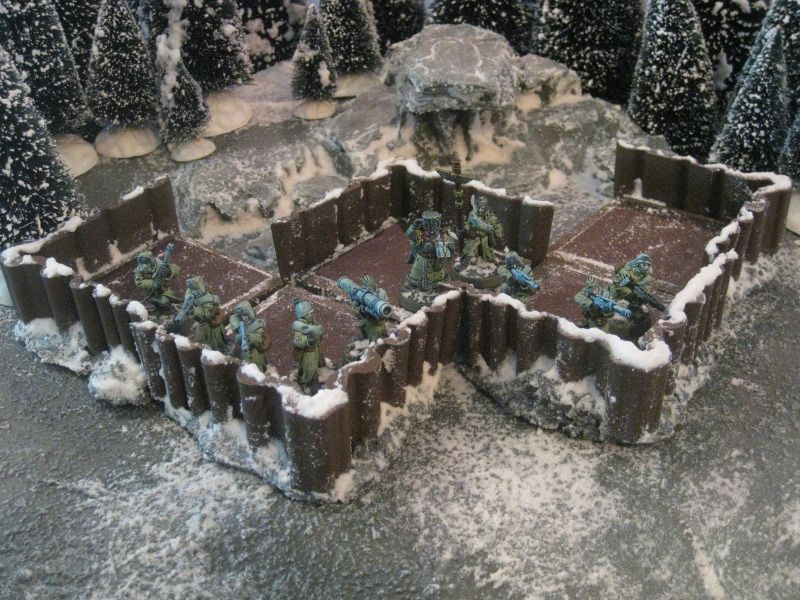
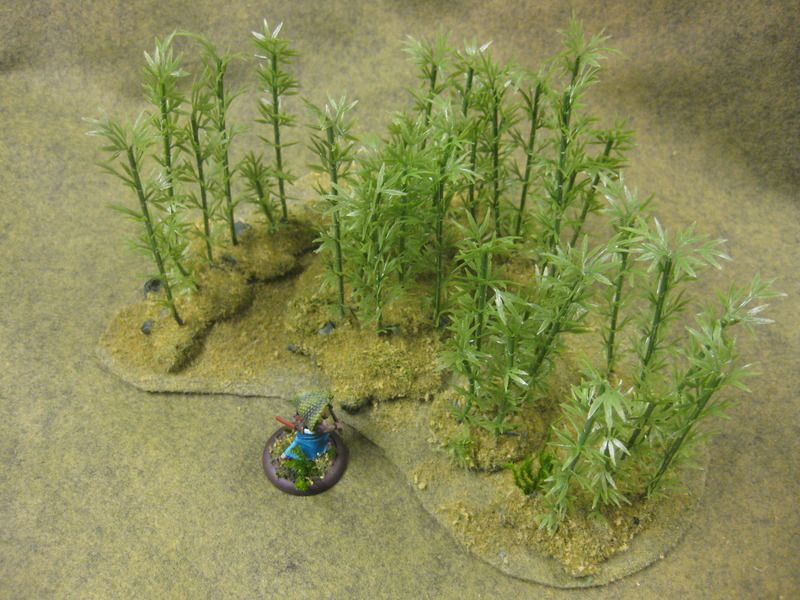
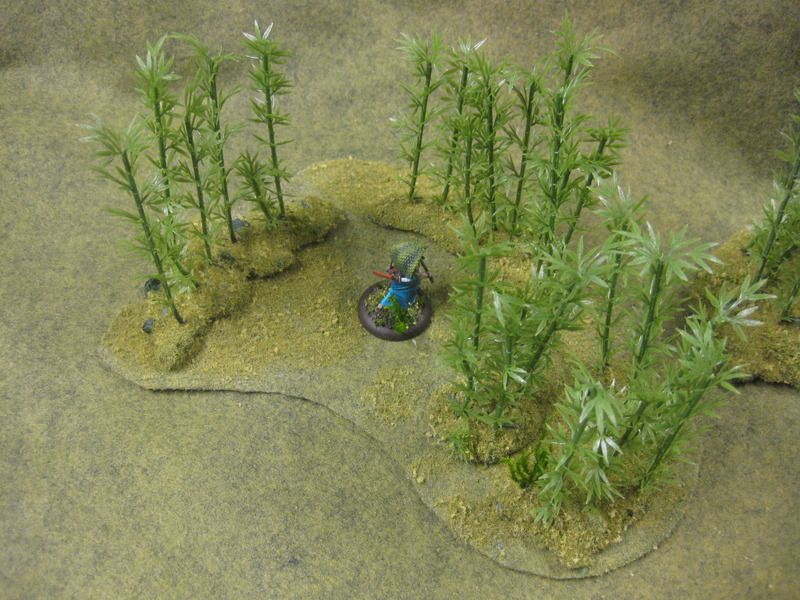
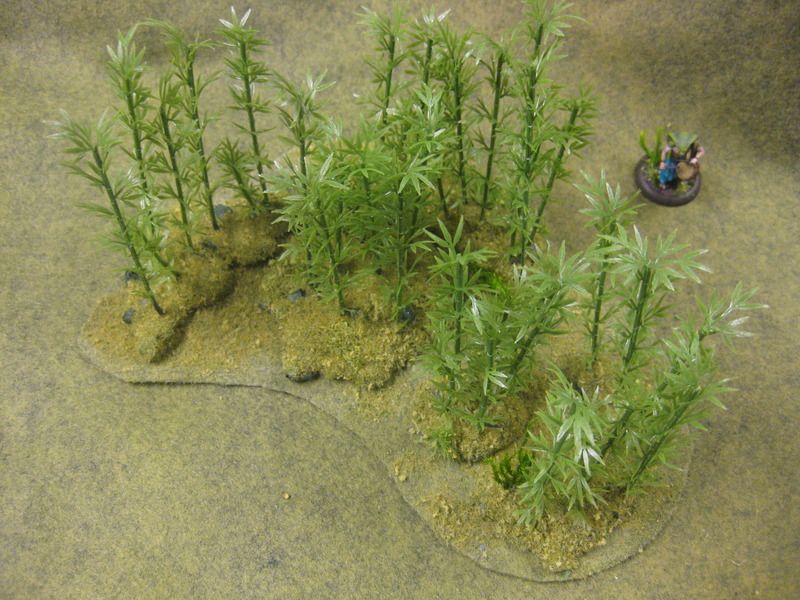
best I can. Here are more pics of the finished bamboo trees.
-Yeti

7 comments:
Thanks for this tutorial. I have a bag of these bamboo shoots and your tutorial has given me great ideas on basing them.
Jim
You're welcome Jim. Let me know if questions pop up as you go.
Excellent idea! My fields have been crying out for bamboo for quite a while now.
Bob,
Let me know how it goes! Always interested to see how other fare with this and even how they might improve it.
Best,
Yeti
Where can I find those Asian themed terrain pieces in the first image?
ty
-j
Just bought a bag of these, not sure where to get gorilla glue? I guess they must have it in the UK somewhere......
Hey Gobbo,
Gorilla Glue has a UK branch, looks like you can at least order it on Amazon UK.
-Yeti
Post a Comment